
Home Improvement
The Energy Impact of Lighting Placement in Your Home

Lighting does more than brighten your space—it directly affects how much electricity your home consumes every day. While many people focus on bulb types or wattage, lighting placement is often overlooked. Yet, where and how you position your lights can significantly influence your energy usage, comfort, and even your monthly bill.
In this guide, we’ll explore how lighting placement impacts energy efficiency and share practical ways to optimize your setup for both savings and functionality.
Why Lighting Placement Matters
Most households use lighting daily without thinking about efficiency. However, poor placement can lead to:
- Overuse of artificial lighting
- Uneven brightness that requires additional fixtures
- Wasted electricity in unused areas
- Increased strain on your overall energy system
Good lighting placement ensures that light is used effectively—reducing the need for excess fixtures and minimizing energy waste.
Maximize Natural Light First
The most energy-efficient light source is the sun—and it’s completely free.
The problem:
- Furniture blocking windows
- Heavy curtains limiting daylight
- Poor room orientation usage
The solution:
Design your space to make the most of natural light during the day.
Practical tips:
- Position workspaces, desks, and reading areas near windows
- Use sheer or light-colored curtains
- Keep windows clean to allow maximum light in
- Avoid placing tall furniture directly in front of windows
By relying more on daylight, you can significantly reduce the need for artificial lighting during peak hours.
Use Layered Lighting Instead of One Bright Source
A single overhead light may seem efficient, but it often leads to over-lighting an entire room.
The problem:
- One central light illuminating unused areas
- Higher wattage bulbs used to compensate
- Uneven lighting distribution
The solution:
Adopt a layered lighting approach:
- Ambient lighting (general room lighting)
- Task lighting (focused lighting for activities)
- Accent lighting (decorative or highlight lighting)
Example:
Instead of turning on a bright ceiling light, use a desk lamp for reading or a floor lamp for relaxing.
This targeted approach reduces energy consumption while improving comfort.
Avoid Overlighting Large Spaces
Bigger rooms don’t always need more lights—they need smarter placement.
The problem:
- Too many fixtures in one area
- Lights left on unnecessarily
- Redundant brightness
The solution:
Place lights strategically where they’re actually needed.
What to do:
- Focus lighting on high-use zones (sofa, table, workspace)
- Use dimmers to control brightness levels
- Turn off lights in unused sections of a room
Smart placement reduces the total number of lights needed, cutting down electricity use.
Position Lights to Reduce Heat Build-Up
Lighting doesn’t just consume electricity—it can also generate heat, especially with older bulbs.
The problem:
- Lights placed near thermostats
- Heat buildup in small or enclosed areas
- Increased cooling demand
The solution:
Place lights in well-ventilated areas and away from temperature-sensitive zones.
Tips:
- Avoid placing lamps close to thermostats
- Use LED bulbs, which emit less heat
- Ensure proper spacing between fixtures
Reducing heat output helps your cooling system work more efficiently, lowering overall energy use.
Make Use of Reflective Surfaces
Lighting placement isn’t just about where the fixture is—it’s also about how light travels.
The problem:
- Light absorbed by dark walls or furniture
- Poor light distribution
- Need for additional fixtures
The solution:
Use reflective surfaces to amplify light.
Ideas to try:
- Place mirrors opposite windows or light sources
- Use light-colored walls and ceilings
- Choose glossy or reflective décor where appropriate
This allows you to achieve better brightness with fewer lights.
Optimize Outdoor Lighting Placement
Outdoor lighting can also impact your electricity bill if not positioned properly.
The problem:
- Lights illuminating unnecessary areas
- Fixtures left on all night
- Inefficient placement
The solution:
Focus outdoor lighting on safety and functionality.
Best practices:
- Use motion-sensor lights
- Direct lighting toward pathways and entry points
- Avoid over-lighting large outdoor spaces
Strategic placement ensures you’re only using energy when and where it’s needed.
Connect Lighting Choices to Energy Awareness
Being mindful of lighting placement is just one part of managing your home’s energy use. Monitoring your consumption, such as reviewing your txu energy bill, can help you identify patterns and see how small changes, like better lighting placement, make a difference over time.
When you combine smart placement with energy-efficient habits, the results can be both noticeable and long-lasting.
Frequently Asked Questions
1. Does lighting placement really affect energy consumption?
Yes. Poor placement often leads to over-lighting or unnecessary use of multiple fixtures, increasing electricity usage.
2. What is the most energy-efficient way to light a room?
Use a combination of natural light, task lighting, and energy-efficient bulbs like LEDs. Focus lighting only where it’s needed.
3. Are LED lights enough to reduce energy costs?
LEDs help significantly, but placement still matters. Even efficient bulbs can waste energy if used improperly.
4. How can I reduce lighting costs without replacing fixtures?
You can:
- Rearrange lighting positions
- Use lamps instead of overhead lights
- Maximize daylight
- Install dimmers or timers
5. Is it better to have multiple small lights or one big light?
Multiple smaller lights (layered lighting) are often more efficient because they allow you to use only what you need.
Final Thoughts
Lighting placement is a simple yet powerful way to improve your home’s energy efficiency. By making thoughtful adjustments—like maximizing natural light, using layered lighting, and positioning fixtures strategically—you can reduce electricity usage without sacrificing comfort or style.
The key is to be intentional. Instead of lighting every corner, focus on lighting the right spaces in the right way. Over time, these small changes can lead to meaningful savings and a more energy-conscious home.
The right choice of treatment is crucial in the case of peeling wallpaper, musty smell, and even visible spots of mould. Normal finishes are not usually made to manage high moisture conditions, particularly in locations where there is usually condensation and structural dampness. Solutions presented in the near future (2026) are based on sophisticated chemistry and practical performance, and will not be short-term solutions. Today, damp-proof paints contain silane siloxane blends and anti-bacterial agents; they are active in controlling moisture as well as interior finishes. The selection of the appropriate product will be based on the knowledge of the origin of damp as well as the performance of the available solutions.
Understanding Damp Proofing in 2026
It is necessary to consider the type of moisture that your walls are facing, before using any form of treatment. The use of damp proof paints is currently used as a breathable protection with the ability to release trapped vapor and exclude the infiltration of surface by liquid water. This balance is crucial in avoiding long-term damage such as bubbling or peeling. Formulations with high quality, especially made using advanced resins, ensure resistance to salt contamination and absorption of moisture. These innovations make sure that the coatings are durable and facilitate the natural drying of building materials.
The Science of Breathability in 2026
Modern damp proofing emphasises breathability as opposed to complete sealing. A wall that is not able to release moisture will result in water retention behind the coating and can be seen to cause some damage in due course. Here, SD values come in, as they determine the ease with which vapor can penetrate a substance. High-performance paints are made to be low resistant to vapor but block penetration of liquids. This enables the walls to maintain a natural control of the moisture level within the walls, which can minimize the chances of blistering and surface failure. Breathable systems have a lasting solution as it supports the structural health of the surface.
Identifying Damp Types
Recognizing the kind of damping can assist in choosing the appropriate product and method.
- The external faults, such as cracks or damaged surfaces, cause penetrating moisture.
- Rising damp is visible in the form of tide marks due to the movement of moisture in the ground.
- Condensation is caused by everyday activities and insufficient airflow in enclosed areas.
- Leaks concealed in hidden areas may also be the cause of constant damp spots behind walls or ceilings.
The 7 Best Damp Proof Paint Products Ranked
1. Best Overall and Professional Choice – Kingfisher Damp Tech
The Kingfisher Building Products dominates the market because of its high silane siloxane technology to create a breathable mesh of fine microscopic pores. This arrangement does not allow the liquid water to enter and the vapor to escape effectively. Compared to standard damp seal paints, it delivers superior breathability while maintaining stronger resistance to water ingress—making it the preferred choice for long-term structural protection.
2. Best for Extreme Condensation – Zinsser Watertite
Zinsser is still doing well with its new Ultra Shield formula, which is made to be used in high moisture conditions. Modern biocides are added to the coating to ensure that fungal growth does not occur on the coating surface over a long period of time. This causes it to be applicable in regions where there are direct condensation problems. The formulation is such that it can preserve the integrity of the surface even when it is subjected to constant humidity. Effective for condensation-heavy environments, though primarily suited for surface-level moisture rather than deeper structural damp issues.
3. Best for Structural Repair – Perma Seal Damp Proof Paint
Perma Seal would be best in a full suite of damp proofing. It can be used in conjunction with DPC injection techniques to curb increased moisture on the ground. The resin is very high, thus forming a strong protective layer that prevents water infiltration. This renders it appropriate to the walls, which need structural-level intervention and not surface treatment. It is effective because of its capability to be integrated with other repair systems.
4. Best for DIY Quick Fixes – Ronseal Anti-Mould Paint
Ronseal is an easy-to-use solution that can help users who want to fix their problem easily and effectively. The formulation aims to control the growth of molds and, at the same time, avoid the formation of moisture on the surface. Its scrubbable finish is easily maintained in places that are subjected to a lot of contact. This renders it applicable in areas where hygiene and reliability are vital. It offers a compromise between simplicity in use and dependability.
5. Best Exterior Protection – Polar Premium Damp Proof Paint
Polar is meant to be applied to exterior surfaces subject to the fluctuating weather conditions. It has an elastic coating that is able to conform to the structural expansion and contraction without cracking. The formulation is stress-resistant against the environmental factors and also has a protective barrier against moisture. It can be used well on rendered surfaces and masonry that is exposed. It is very durable and protects it in the long term against external sources of moisture.
6. Best for Direct Application – Johnstone’s Revive Damp Seal
The product offered by Johnstone can be used in fast redecorating, and time is scarce. It may be applied directly to damp areas to stop the bleeding of the stains through the upper layers. It has a quick drying characteristic that enables quick completion of the project. This renders it appropriate for localized repair as opposed to extensive treatment. It is convenient, efficient, and can be used in small spaces.
7. Best Value – Dryzone Damp Resistant Specialist Paint
Dryzone offers a low-cost solution without sacrificing vital performance. Its permeable composition enables the wall to dry naturally whilst providing waterproofing. It is also well adapted to large renovation projects in which budget management is a concern. The paint is efficient in a wider scope of the damp management system. Its affordability and functionality render it a formidable value product.
Cost Comparison Insight
Deciding what to do between the ordinary paint and specialist damp proof solutions can be reduced to long-term value.
- Entry-level emulsion coatings must be repainted often as they have only a limited moisture resistance.
- Specialist treatments offer long-term protection that saves on maintenance expenses in the long run.
- An increase in initial capital means a reduced cost of use per year over long-term use.
- Structural damage is avoided due to a durable coating that will save extra repair costs.
In most cases, investing in a high-performance solution upfront significantly reduces long-term maintenance and repair costs.
Pro Contractor Application Steps
The correct application of damp proof paint is a crucial action, as well as the choice of the product.
- Surface testing: Before treatment, find weak or damaged plaster by doing a surface test.
- Add salt neutralizing solutions to stop the attraction of moisture of hygroscopic deposits.
- Maintain a surface temperature equal to the dew point to ensure that the surface is adhesively sound.
- Take time to dry out between finishes to be at optimal performance and strength.
The Kingfisher Advantage
Among the products listed, Kingfisher stands out for its balance of breathability, durability, and suitability across multiple damp scenarios. Kingfisher Building Products delivers exceptional quality products through its advanced technical solutions for the United Kingdom market. The designers of their products create items that show dependable performance during challenging situations. Their budget-friendly products include comprehensive technical information and product specifications, which enable customers to handle intricate tasks. The organization provides this level of help because it enables users to succeed in difficult situations. The company has built its reputation through continuous research and development work, which has established it as a reliable provider of damp proofing products.
Smarter Protection Choices
Correct damp-proof paint selection requires specific moisture identification, along with surface assessment and understanding of future requirements. The products exist to fulfill specific functions, while selecting the appropriate item will help avoid future repairs and extra costs. Users who combine accurate diagnosis with premium materials will experience dependable results that endure over time. The surfaces will remain protected and stable while their appearance will stay preserved through the use of informed protection methods. For long-term protection and reliable performance, choosing a high-quality solution like Kingfisher Damp Tech ensures you fix the root cause—not just the symptoms.

Living in a tropical climate has its perks—warm weather, lush surroundings, and plenty of sunshine. But it also comes with a challenge many households face: higher electricity consumption.
If you live in a tropical region, you may have noticed that your energy bills tend to be higher than expected. This isn’t just about using more appliances—it’s about how climate, habits, and home design all work together to increase energy use.
In this article, we’ll explore why tropical households often consume more electricity and, more importantly, how you can adapt without sacrificing comfort.
Why Tropical Homes Naturally Use More Energy
Tropical climates create unique conditions that influence how homes consume electricity.
1. Constant Need for Cooling
High temperatures and humidity make cooling a necessity, not a luxury.
- Air conditioners run for long hours
- Fans operate throughout the day
- Cooling systems rarely get a break
Unlike colder climates where heating is seasonal, cooling in tropical areas is often year-round.
2. Humidity Increases Energy Demand
Humidity doesn’t just make the air feel warmer—it affects how your home functions.
- Air conditioners work harder to remove moisture
- Dehumidifiers may be used
- Appliances may take longer to dry or cool
This increases overall energy consumption.
3. More Frequent Appliance Use
In tropical households:
- Refrigerators work harder to maintain temperature
- Laundry may be done more often due to sweat and heat
- Cooling devices are used in multiple rooms
These daily demands add up quickly.
4. Home Design Isn’t Always Climate-Optimized
Many homes are not built with tropical efficiency in mind.
Common issues:
- Poor insulation
- Limited airflow
- Direct exposure to sunlight
This forces cooling systems to compensate, increasing electricity usage.
5. Lifestyle Habits Adapt to Heat
People naturally adjust their behavior to stay comfortable.
This includes:
- Using air conditioning overnight
- Keeping lights and devices on for convenience
- Staying indoors more often
While understandable, these habits can increase energy consumption.
The Hidden Cost of Tropical Living
These factors lead to:
Higher Daily Energy Use
Continuous cooling and appliance usage.
Increased Monthly Bills
More frequent and longer usage periods.
Greater Sensitivity to Pricing
Even small inefficiencies can have a noticeable impact.
In regions where energy pricing varies—such as areas influenced by gas rates georgia—understanding your usage becomes even more important for managing costs.
How to Adapt and Reduce Energy Waste
Living in a tropical climate doesn’t mean you have to accept high electricity bills. With the right strategies, you can stay comfortable and efficient.
1. Optimize Natural Ventilation
Airflow is your best friend.
- Open windows during cooler hours
- Use cross-ventilation to move air through your home
- Install vents or fans to improve circulation
This reduces reliance on air conditioning.
2. Use Fans Strategically
Fans use far less energy than air conditioners.
- Combine fans with AC to reduce cooling load
- Use ceiling or standing fans for airflow
- Turn off fans when leaving the room
3. Adjust Your Air Conditioning Habits
Instead of running AC constantly:
- Set a moderate temperature
- Use timers or sleep mode
- Turn it off when not needed
Small adjustments can lead to significant savings.
4. Block Heat From Entering Your Home
Preventing heat is easier than removing it.
- Use curtains or blinds during peak sunlight
- Install reflective window films
- Add shading outside windows
This keeps indoor temperatures more stable.
5. Choose Energy-Efficient Appliances
In tropical climates, appliances work harder—so efficiency matters more.
- Look for energy-saving models
- Maintain appliances regularly
- Replace outdated units when possible
6. Be Smart With Laundry and Drying
Instead of relying on dryers:
- Air-dry clothes whenever possible
- Wash full loads
- Use appropriate settings
Tropical weather often makes air-drying easy and effective.
7. Reduce Indoor Heat Sources
Some everyday activities add heat to your home.
- Limit oven use during the hottest parts of the day
- Use smaller appliances like microwaves or rice cookers
- Turn off unused electronics
8. Create a Cooling Routine
Consistency helps manage energy use.
- Cool your home before bedtime
- Use fans during the day
- Adjust settings based on weather conditions
The Role of Awareness in Energy Efficiency
In tropical households, energy use often feels unavoidable.
But the key difference between high and controlled energy bills is awareness.
When you:
- Understand how your environment affects usage
- Recognize your habits
- Make small adjustments
You gain control over your energy consumption.
Small Changes That Make a Big Difference
You don’t need to change everything at once.
Start with:
- Adjusting your thermostat slightly
- Using fans more often
- Blocking sunlight during peak hours
These simple steps can reduce your electricity usage without affecting your comfort.
Frequently Asked Questions (FAQs)
1. Why do tropical homes use more electricity?
Because of constant cooling needs, high humidity, and frequent appliance use.
2. Is it possible to reduce energy use without air conditioning?
In some cases, yes—using ventilation and fans can reduce reliance on AC.
3. What’s the biggest energy consumer in tropical homes?
Air conditioning is typically the largest contributor.
4. Does humidity affect electricity usage?
Yes. It makes cooling systems work harder and increases overall energy demand.
5. What’s the easiest way to save energy in a hot climate?
Using fans and blocking heat from entering your home are simple and effective steps.
6. Can small changes really lower my electricity bill?
Absolutely. Consistent small adjustments can lead to noticeable savings over time.
Final Thoughts
Living in a tropical climate naturally increases your need for cooling and comfort—but it doesn’t have to mean high electricity bills.
By understanding how your environment affects your energy use and making small, intentional changes, you can create a home that stays cool without wasting energy.
Because in the end, adapting to your climate isn’t about using less—it’s about using energy smarter.
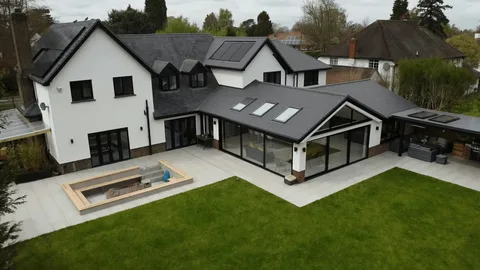
Timing is one of the most underestimated factors in the success of a home extension project. Most homeowners focus their energy on design, budget, and contractor selection, which are all essential considerations, but the question of when to begin the process is equally consequential. A Double Storey Extension is a significant undertaking that involves multiple professional disciplines, a planning process that can take several months, and a construction programme that will affect daily life in the home for an extended period. Getting the timing right means understanding each of these dimensions and making a start at the point that gives the project the best possible conditions for success. This guide sets out the key considerations that should inform that decision.
Why Timing Matters More Than Most Homeowners Realise
The gap between deciding to build a double storey extension and moving into the finished spaces is almost always longer than homeowners initially expect. From the first architectural appointment to the completion of construction, a well-managed double storey project typically spans twelve to eighteen months, sometimes longer on complex sites or in planning-sensitive areas. Understanding this timeline from the outset allows homeowners to plan around it intelligently rather than being surprised by it midway through the process.
Starting too late creates pressure at every subsequent stage. Rushed design decisions produce weaker planning applications. Compressed contractor procurement leads to less competitive pricing and less rigorous selection. And a build programme that runs into winter without adequate preparation faces weather-related delays that affect both programme and quality. Starting at the right time, with a clear understanding of what lies ahead, gives every stage of the project the space it needs to be done properly.
The Best Time of Year to Begin the Design Process
The design and planning stage of a double storey extension is largely independent of the seasons and can be initiated at any point in the year. However, the most strategically advantageous time to begin is in late summer or early autumn. Starting the architectural process in August or September means that planning drawings can be prepared, refined, and submitted to the local authority by October or November. Planning applications for straightforward residential extensions are typically determined within eight weeks, which places an approval decision in December or January.
This timing creates an ideal foundation for the construction stage. With planning approval secured over winter, the contractor procurement process can be completed in the early months of the new year, and construction can begin in spring. A spring start is widely regarded by construction professionals as the optimal point to commence a double storey build. Ground conditions are typically at their best after the winter frost has passed, the longer days provide more productive working hours, and the programme has the maximum possible number of dry weather months ahead of it before the following winter.
Planning Permission and Why Early Preparation Pays
The planning process is the stage over which homeowners have the least direct control once an application has been submitted, and it is therefore the stage that rewards the most careful preparation. A double storey extension almost always requires full planning permission, and the quality of the application, the strength of the design response to its context, and the completeness of the supporting documentation all influence both the likelihood of approval and the speed with which a decision is reached.
Engaging an experienced architectural practice early in the process means that the design can be developed with a thorough understanding of the relevant planning policies and local character considerations before any drawings are finalised. Pre-application advice from the local authority, where available, can identify potential concerns at an early stage and allow the design to be adjusted before a formal submission is made. This investment of time and care at the preparation stage consistently produces better and faster outcomes than applications prepared in haste and submitted without adequate groundwork.
Seasonal Considerations for the Construction Stage
While the design and planning stages can be managed effectively at any time of year, the construction stage is genuinely influenced by seasonal conditions. The foundation and groundwork phase of a double storey extension is particularly sensitive to weather. Prolonged wet conditions can delay excavation and concrete pours, and frozen ground in the depths of winter can bring groundwork programmes to a temporary halt.
For this reason, the most experienced contractors and project managers prefer to have the groundwork phase completed before the onset of the worst winter weather. A spring start achieves this naturally, with foundations and ground floor slab typically completed by early summer and the superstructure rising through the most productive months of the year. Roofing and weatherproofing can then be completed before autumn, allowing the internal fit-out to proceed through winter in a dry and enclosed shell.
Family Life and Disruption Planning
A double storey extension inevitably creates disruption to daily life in the home, and the timing of the build should take the rhythms of family life into account. School calendars, planned holidays, significant family events, and work commitments all influence which periods of the year are most and least suited to living alongside a construction site. The most prepared homeowners factor these considerations into their programme planning from the outset, identifying the windows that will cause the least disruption and working with their architectural and construction teams to align the programme accordingly.
Starting the Conversation Now
Extension Architecture works with homeowners at every stage of the double storey extension journey, from the first feasibility conversation through to the completion of construction. The most successful projects are those that begin with a clear-eyed assessment of timing, programme, and process, and that give every stage the preparation and expertise it deserves. The best time to start that conversation is always earlier than you think.


Charlie Sheen Net Worth: Career, Earnings, Assets, and Financial Journey

The Energy Impact of Lighting Placement in Your Home
AnnaLynne McCord Husband: Everything You Need to Know About Her Relationship Status

Carolin Bacic: Life, Biography, Family, and Legacy

Christine Williamson: A Rising Star in Sports Journalism

Dani Daniels: A Complete Biography of the Artist, Media Personality, and Entrepreneur
-
 Celebrity7 months ago
Carolin Bacic: Life, Biography, Family, and Legacy
-
 Celebrity1 year ago
Christine Williamson: A Rising Star in Sports Journalism
-
 Celebrity7 months ago
Dani Daniels: A Complete Biography of the Artist, Media Personality, and Entrepreneur
-

 Celebrity6 months ago
Juan Gabriel: The Legendary Life of El Divo de Juárez
-

 Celebrity3 months ago
Dame Esther Rantzen: Life, Career, and Legacy of a British Broadcasting Icon
-

 Celebrity3 weeks ago
Valerie Perrine: A Complete Biography of the Acclaimed Actress and Icon
-

 Celebrity1 year ago
Vera Davich: Biography, Life, and Legacy2025
-

 Celebrity1 year ago
Berniece Julien: A Comprehensive Biography2025