
Home Improvement
The Complete Guide to Fish Tank Care — Including What to Do About Snail Eggs

Let’s be honest about something. Fish tank care has a reputation for being complicated that it does not entirely deserve. Yes, there is chemistry involved. Yes, there are parameters to monitor and equipment to maintain. But once you understand the fundamentals — once the basic logic of what a healthy tank requires clicks into place — the whole thing becomes considerably more manageable than the rows of products at your local fish store might suggest.
This guide covers everything you need to know to maintain a healthy freshwater fish tank, including one of the topics that catches even experienced fishkeepers off guard: snail eggs in the fish tank. Where they come from, what they look like, whether you need to worry about them, and what to do if your tank suddenly seems to be producing more snails than fish.
The Foundation of Good Fish Tank Care
Before getting into the specifics, it helps to understand what you are actually trying to achieve with fish tank maintenance. The goal is not a spotlessly clean tank — in fact, a tank that has been scrubbed too thoroughly and too frequently is often less healthy than one that looks a little lived-in. The goal is stable, appropriate water chemistry, a functioning biological filtration system, and an environment that meets the physical and behavioural needs of the fish living in it.
Everything in fish tank care flows from that understanding. Water changes, filter maintenance, feeding habits, stocking levels — they all serve those core goals. When something goes wrong in a fish tank, tracing it back to one of those fundamentals almost always reveals the cause.
Setting Up for Long-Term Success
Good ongoing maintenance begins with a well-set-up tank. Trying to maintain a tank that was poorly established from the start is like trying to keep a house tidy when the foundations are crumbling — you are always dealing with symptoms rather than causes.
Tank size. Bigger tanks are easier to maintain than smaller ones. This surprises many beginners, who assume a smaller volume means less work. In practice, the opposite is true. A larger volume of water is more chemically stable — waste, uneaten food, and other organic matter have less immediate impact on water parameters in a larger tank than a smaller one. The same amount of fish waste in a 10-gallon tank creates a far more serious water quality problem than in a 50-gallon tank. If you are struggling to maintain water quality and are keeping fish in a small tank, upgrading to a larger one may solve the problem more effectively than any combination of products.
Filtration. The filter is the heart of any fish tank. It performs three distinct functions — mechanical filtration, which removes physical debris from the water; biological filtration, in which colonies of beneficial bacteria convert toxic ammonia into nitrite and then into the relatively harmless nitrate; and in some configurations, chemical filtration, typically through activated carbon, which removes certain dissolved impurities.
Of these three functions, biological filtration is by far the most important. The bacterial colonies that carry it out — primarily Nitrosomonas and Nitrobacter species — live on the surfaces of filter media and cannot be replaced by any chemical product. They take weeks to establish and can be destroyed in hours by careless maintenance. Understanding this is fundamental to understanding why filter maintenance must be done carefully.
Never clean your filter media in tap water. Tap water contains chlorine or chloramine, which kills beneficial bacteria on contact. Always rinse filter media in water taken from the tank itself — the same water the bacteria are already living in. Never clean all of your filter media at the same time. If you run multiple filter sponges or media types, clean one at a time, leaving the others untouched so the bacterial colony is never completely disrupted.
Substrate and hardscape. Gravel, sand, bare glass — all are viable substrate options with different maintenance implications. Gravel traps debris between the particles, which decomposes and contributes to nitrate load if not vacuumed regularly. Sand keeps debris on the surface, where it is more visible and easier to remove but also more easily disturbed. Bare glass bottoms are the easiest to keep clean but can look sterile. Rocks, driftwood, and other hardscape provide surfaces for beneficial bacteria to colonise, hiding places for fish and invertebrates, and visual interest. Choose hardscape that will not alter your water chemistry in unwanted ways — some rocks raise pH and hardness significantly, which may or may not suit your fish.
The Weekly Maintenance Routine
Consistent routine is the foundation of good fish tank care. A tank that receives regular, modest attention stays healthy far more easily than one that is neglected for weeks and then subjected to emergency intervention.
Water changes. The weekly partial water change is the single most important maintenance task. For most community fish tanks, changing 20 to 25 percent of the tank volume weekly keeps nitrate levels manageable and removes the dissolved organic compounds that accumulate over time and that no filter removes.
Use a gravel vacuum during water changes to remove debris from the substrate simultaneously. Work methodically across the bottom of the tank, pushing the vacuum into the gravel or moving it across the sand surface, removing the water along with the waste. This combines the water change with substrate cleaning in a single efficient process.
Always treat new water with a quality dechlorinator before adding it to the tank. Always match the temperature of replacement water to the tank temperature as closely as possible. A thermometer and a bucket are all you need for this — fill the bucket, test the temperature, adjust with hot or cold water until it matches the tank, then add dechlorinator and pour it in.
Glass cleaning. Algae grows on the glass of virtually every aquarium. In moderate amounts it is harmless and actually indicates a healthy, lit tank. When it begins to obscure your view of the fish, clean it with an algae scraper or magnetic cleaner. Clean the inside of the glass during water changes so the loosened algae gets removed with the water change rather than settling back on the substrate.
Checking equipment. Take a moment each week to verify that all equipment is functioning correctly. The filter is running, the heater is maintaining the correct temperature, the light is working. Equipment failures that go unnoticed can have rapid consequences — a failed heater in winter can drop tank temperature dangerously before you realise anything is wrong.
Observing the fish. This is not strictly equipment maintenance but it is an essential part of the weekly routine. Watch your fish for a few minutes during and after the water change. Healthy fish are active, alert, swimming smoothly, and eating readily. Any deviation — lethargy, loss of colour, unusual swimming posture, visible spots or growths, fish hiding persistently — warrants closer attention. Catching health problems early makes them dramatically easier to address.
Monthly and Periodic Maintenance
Beyond the weekly routine, several tasks require attention on a monthly or periodic basis.
Filter maintenance. As noted above, clean filter media carefully and never all at once. The frequency depends on the filter type, the stocking level of the tank, and how quickly media becomes clogged. A filter that is visibly impeding flow — where you can see the output has reduced significantly — needs attention regardless of when it was last cleaned.
Water testing. If your tank is well-established and stable, weekly testing may be more than necessary. Monthly comprehensive testing — checking ammonia, nitrite, nitrate, and pH at minimum — gives you a clear picture of the tank’s health and catches any gradual drift in parameters before it becomes a problem. Test more frequently after any significant change to the tank — new fish added, a medication course completed, a filter issue resolved.
Plant maintenance. If you keep live plants, trim dead or dying leaves regularly. Decomposing plant matter contributes to nitrate and can cloud the water. Remove any plants that are not thriving — a dying plant produces more problems than no plant at all.
Equipment deep clean. Periodically — every three to six months — disassemble equipment for a more thorough clean. Filter housings, heater casings, and return pipes accumulate organic matter over time. Clean everything except the biological media thoroughly, using warm water and a soft brush.
Snail Eggs in the Fish Tank — Everything You Need to Know
At some point, many fishkeepers open their tank lid or peer through the glass and notice something they have not seen before. Small clusters of translucent jelly-like material attached to the glass, to plants, to hardscape, or to the underside of a lid. Sometimes they are almost invisible. Sometimes they are quite conspicuous. And almost always, the first reaction is some version of the same question.
What is that — and should I be worried?
In the majority of cases, what you are looking at is snail eggs. And the answer to whether you should be worried depends almost entirely on which snail laid them and how you feel about snails in your tank.
How Snails Get Into Fish Tanks
The most common question from fishkeepers who discover snail eggs is how snails got into their tank in the first place — particularly if they have never intentionally added any.
The answer is almost always the same: hitchhikers. Snails, snail eggs, and snail egg masses are remarkably good at hiding on aquatic plants, on hardscape, in bags of water from fish stores, and on equipment. A single snail egg cluster on a new plant, invisible to the naked eye, can establish a snail population within weeks. A single adult snail in the water of a bag containing new fish can seed a tank with offspring before anyone realises it is there.
This is not a criticism of fish stores or plant suppliers — it is simply the reality of aquatic ecosystems. Snails are present in virtually every aquatic environment, and preventing them from entering an aquarium requires deliberate quarantine and inspection practices that most hobbyists do not maintain rigorously.
What Snail Eggs Look Like
Different snail species produce noticeably different egg masses, and being able to identify them helps determine how to respond.
Ramshorn snail eggs are among the most commonly encountered in freshwater tanks. They appear as small, flat, disc-shaped clusters of jelly — usually containing anywhere from a handful to around 12 individual eggs — attached to glass, plants, or hardscape. The individual eggs are visible within the jelly mass as small round dots. Fresh egg masses are clear or very slightly pink. As they develop, the eggs darken slightly. Ramshorn snails are harmless algae eaters that most fishkeepers consider beneficial in moderate numbers.
Bladder snail and pond snail eggs are similar in appearance to ramshorn eggs — small, clear jelly clusters attached to surfaces, containing visible round eggs. These snails reproduce prolifically and are the ones most likely to lead to population explosions in established tanks. They are not harmful to fish or healthy plants but can become visually overwhelming in large numbers and may nibble on delicate plant species.
Mystery snail eggs — from the popular aquarium snail Pomacea bridgesii — are unmistakable and unlike any other snail egg mass in the freshwater hobby. Mystery snails lay their eggs above the waterline, depositing a large, firm, pink or salmon-coloured clutch on the glass above the water surface or on the underside of the tank lid. Each clutch can contain dozens to over a hundred eggs and is hard to miss once you know what you are looking for. Mystery snails are popular, attractive, and entirely peaceful — many fishkeepers keep them deliberately.
Nerite snail eggs are different again — small, hard, white capsules attached firmly to surfaces throughout the tank. They look almost like tiny white sesame seeds dotted on glass, rocks, and driftwood. Nerite snails are arguably the best algae-eating snails available for aquariums, and many fishkeepers keep them specifically for algae control. Their eggs, however, will not hatch in freshwater — nerite larvae require brackish or salt water to develop — so a nerite population in a freshwater tank will not grow beyond the snails you intentionally introduced.
Are Snail Eggs Harmful?
In themselves, no. Snail eggs are not harmful to fish, to plants, or to water quality. They do not affect water parameters and are not toxic in any way. The concern with snail eggs is not the eggs themselves but what they represent — the potential for a snail population that grows faster than you want it to.
Should You Remove Snail Eggs?
Whether to remove snail eggs depends on your attitude toward snails and the specific species involved.
If the eggs belong to nerite snails, there is no practical reason to remove them — they will not hatch in freshwater and the population cannot grow. Many fishkeepers simply ignore them or gently scrape them off the glass during cleaning if they find them visually distracting.
If the eggs belong to mystery snails that you are keeping intentionally, remove or leave them based on whether you want more mystery snails. If you do, leave the clutch in place and ensure it stays moist but not submerged — mystery snail eggs need air to develop. If you do not want more snails, remove the clutch before it hatches.
If the eggs belong to bladder snails, pond snails, or ramshorn snails and you are concerned about population growth, removing egg masses when you spot them is a reasonable step. It will not eliminate snails from the tank — they reproduce quickly enough that you will not catch every clutch — but it can slow population growth.
Managing Snail Populations
For fishkeepers who find their snail population has grown beyond what they want, several management approaches are effective.
Manual removal. Simply picking snails out of the tank by hand or with a net and removing them is the most direct approach. It requires consistency — removing snails regularly over several weeks rather than a single large cull — but is entirely effective over time without any risk to the tank’s ecosystem.
Reducing food availability. Snail populations grow in direct proportion to available food. Overfeeding a fish tank creates an abundant food source for snails — uneaten fish food and organic debris on the substrate support large snail populations. Reducing overfeeding and vacuuming the substrate regularly removes the food source and limits population growth naturally.
Snail traps. Commercial snail traps and DIY versions — a piece of blanched vegetable placed on the substrate overnight, removed in the morning with snails clinging to it — are effective at reducing populations without chemicals or introducing new fish.
Predatory fish. Several fish species eat snails enthusiastically. Assassin snails — technically an invertebrate rather than a fish — are popular for snail control, hunting and eating pest snails while being peaceful toward fish. Loaches, particularly clown loaches and yoyo loaches, are effective snail hunters. Pufferfish are perhaps the most enthusiastic snail eaters of all, though their care requirements and temperament make them unsuitable for community tanks.
Chemical treatments. Products designed to kill snails are available but should be used with caution. Many are harmful to other invertebrates — shrimp in particular — and some can affect the biological filtration if used incorrectly. Manually removing snails is almost always preferable to chemical intervention.
The Bigger Picture of Fish Tank Care
Fish tank care is, at its core, about consistency and observation. A tank that receives regular modest attention — weekly water changes, consistent feeding, daily observation — is a tank that stays healthy. Problems in fish tanks almost never appear suddenly without warning. They develop gradually, and the fishkeeper who is paying attention catches them early, when they are simple to address.
The snail eggs on your glass, the slight cloudiness after a missed water change, the fish that is a little less active than usual — these are all signals worth noticing. Noticing them, understanding what they mean, and responding appropriately is what separates a fishkeeper whose tank thrives from one whose tank lurches from one crisis to the next.
The information in this guide gives you the foundation. What you build on it, one water change and one observation at a time, is the tank you want.
Visit The Goldfish Tank for in-depth guides on every aspect of fish tank care, and read the full dedicated guide to snail eggs in fish tanks for a comprehensive look at every snail species you are likely to encounter, what their eggs look like, and exactly how to manage them.



That final coat of paint on the walls often feels like the finishing line, but the real personality of a home shines through in the little things that come next. These small, often overlooked elements are what truly lift a space from just being decorated to feeling genuinely thought out. Paying close attention to your hardware, finishes, and fittings is the secret sauce for creating a home that feels both personal and polished.
These subtle choices actually make a huge difference to how a room feels overall. Just think about the satisfying weight of a solid brass doorknob, or the clean, modern vibe of a minimalist light switch. These aren’t just things you see; they’re things you touch, and they quietly tell you about quality and intention.
Why Finishes Truly Matter
The finish of your hardware is one of the most powerful ways to tie everything together visually. Whether you’re into cool chrome, sleek matte black, or warm brass, keeping it consistent is key. When your doorknobs, cabinet handles, window latches, and light fittings all share the same finish, it creates a subtle but strong visual thread running through your home. This repetition helps your eyes glide smoothly through the space, making it feel organised and calm.
Take antique brass, for example. It brings a timeless warmth and a sense of lived-in luxury that works beautifully in both traditional and modern homes. Its golden tones can soften a minimalist space or deepen the richness of a more classic design.
This consistent approach can go beyond just handles and hinges; thinking about matching brass lighting for your home adds another layer of sophistication. When every metallic piece speaks the same design language, your home ends up feeling intentional and expertly put together.
Matching Hardware to Your Personal Style
The hardware you choose really shows off your personal taste. Before you settle on a particular style, it’s a good idea to find your home design style to make sure your choices feel like you. If you love a minimalist look, you might lean towards sleek, simple bar handles in matte black or stainless steel. If your style is more industrial, perhaps you’d prefer knurled handles and sturdy, functional designs.
For those who adore a bit of vintage or cottage charm, aged brass or classic ceramic knobs can add that perfect touch of nostalgia. The trick is to see hardware not just as something practical, but as an accessory for your home. Just like a belt or a piece of jewellery can complete an outfit, the right hardware can perfectly express your living space’s personality.
Beyond the Basics: Electrical Fittings
One of the most commonly overlooked spots for a design upgrade is electrical fittings. For ages, the standard white plastic switch and socket have been the go-to, but let’s be honest, they don’t do much for a room’s look. Swapping these out for fittings with a more deliberate design and finish can make a surprisingly big difference.
Imagine a beautifully wallpapered wall, not broken up by a plain plastic rectangle, but by a sleek, screwless socket in a bronze or nickel finish. These small changes stop functional bits from clashing with your design. Instead, they become part of it. Investing in high-quality switches with a satisfying click, or dimmer switches that match your other hardware, adds another layer of subtle luxury you’ll appreciate every single day.
Crafting a Cohesive Interior Narrative
Ultimately, all these little decisions work together to tell a story about your home and the people who live in it. When your doorknobs, light switches, cabinet pulls, and tapware all share a common design DNA, you create a cohesive story for your interior. This doesn’t mean every single item has to be identical, but they should definitely feel like they belong together.
This attention to detail signals a home that’s been put together with care and thought. It goes beyond fleeting trends to create a lasting sense of style. By starting with the small things, you build a strong foundation for a home that’s not just beautiful, but also a true reflection of your personal taste.
These thoughtful details are what truly turn a house into a home with its own distinct point of view.
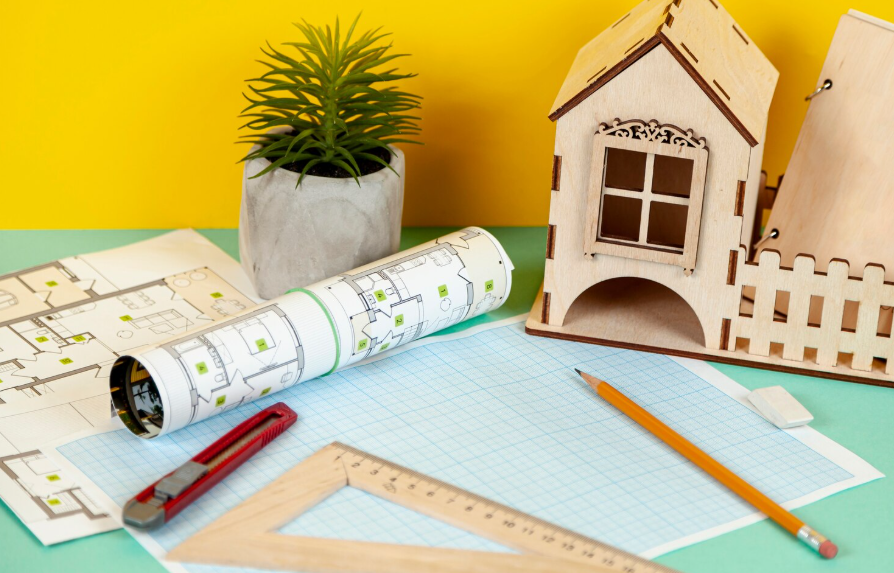
Building a custom home offers something that buying an existing property cannot always provide: the opportunity to create a home around the way you actually want to live.
Room layouts, storage, natural light, materials, energy performance, accessibility, and architectural character can all be considered from the beginning.
That flexibility also creates complexity.
A custom build involves land, design, permissions, budgets, contractors, materials, schedules, and hundreds of individual decisions.
Careful preparation can make the process more manageable and help homeowners turn an initial idea into a practical finished property.
Start With Your Priorities
Before thinking about finishes and furniture, identify what the home needs to achieve.
Consider the number of bedrooms, bathrooms, living spaces, working areas, storage requirements, parking, outdoor areas, and accessibility needs.
Think about lifestyle rather than simply room count.
A family that regularly entertains may value large connected living spaces, while someone working permanently from home might prioritize a quiet office.
Separate essential requirements from features that would simply be nice to have.
This becomes useful when design or budget decisions require compromises.
Evaluate the Site
The site can influence almost every part of a custom build.
Orientation, access, ground conditions, drainage, neighbouring properties, utilities, levels, and surrounding development can affect design and construction.
A design should respond to the site rather than treating it as an empty rectangle.
For example, orientation can influence opportunities for natural light, while changes in ground level can affect foundations and landscaping.
Appropriate professional assessments can identify limitations before significant design decisions are finalized.
Establish a Realistic Budget
Custom-build budgets need to account for more than construction materials and labour.
Professional fees, surveys, permissions, utility connections, site preparation, landscaping, kitchens, bathrooms, finishes, and other expenses may all contribute to the total.
A contingency can also provide flexibility for legitimate unexpected costs.
Be transparent about the budget with the professionals involved.
Designing a property that cannot realistically be constructed within the available budget wastes time and can lead to difficult compromises later.
Work Closely With the Design Team
Architectural design is where requirements begin becoming a physical building.
A good design process considers aesthetics and practicality together.
Discuss how rooms connect, where natural light enters, how people move through the property, where storage will be located, and how the home might adapt to future requirements.
Construction considerations should also be discussed during design.
Early communication between architects, engineers, and construction professionals can help identify potential buildability issues before they reach the site.
Choose a Builder With Relevant Experience
Building a complete home requires different capabilities from completing a small refurbishment.
Look for contractors with relevant residential construction experience and examine the type and scale of their previous projects.
Reviewing previous work and the contractor’s approach to project delivery can help homeowners determine whether their experience matches the proposed build. Those researching custom build homes by ARN Projects can review how the company approaches bespoke residential construction, including collaboration, project planning, construction, and completion.
Communication should also influence the decision.
A custom build can take a considerable amount of time, so homeowners need a working relationship that supports clear communication throughout the project.
Define the Scope Before Construction
Detailed documentation helps reduce uncertainty.
Plans and specifications should make clear what the contractor is expected to provide.
Materials, fixtures, finishes, electrical requirements, heating, plumbing, doors, windows, and other components should be defined as thoroughly as reasonably possible before construction.
Unresolved decisions can create delays if contractors reach a stage where they cannot proceed without additional information.
Making key choices early can therefore support smoother project delivery.
Think About Energy Performance
A custom build provides an opportunity to consider energy performance from the beginning.
Orientation, insulation, glazing, airtightness, ventilation, heating, and renewable technologies can all influence long-term energy use.
These elements work best when considered as part of an integrated design.
Adding individual technologies without considering the wider building may not produce the expected results.
Homeowners should discuss both upfront costs and expected long-term performance when comparing options.
Plan Storage Early
Storage is easy to underestimate when looking at attractive architectural drawings.
Consider everyday belongings.
Where will coats, shoes, cleaning equipment, luggage, children’s items, sports equipment, food, and household supplies be stored?
Built-in storage can often be integrated more effectively during the design stage than added after construction.
Practical storage can also help maintain the clean appearance homeowners often want from a newly built property.
Consider Future Accessibility
A custom home can be designed around current requirements while also considering how those requirements might change.
Wider circulation spaces, suitable entrances, flexible rooms, and thoughtful bathroom layouts can improve long-term usability.
Accessibility does not necessarily mean creating a clinical-looking home.
When considered early, many practical features can be integrated naturally into the architecture.
Future flexibility can be especially valuable for homeowners planning to remain in the property for many years.
Control Changes During Construction
Even carefully planned projects experience changes.
A homeowner may select a different material or request an alteration after seeing part of the building physically constructed.
Changes should be managed carefully.
Before approving one, establish how it affects cost, schedule, materials, and other areas of work.
Numerous small changes can collectively have a substantial impact on the final budget.
Documenting significant variations provides a clear record for everyone involved.
Maintain Regular Communication
Custom construction involves ongoing decisions.
Agree on how progress will be communicated and who is responsible for answering questions.
Regular updates can help homeowners understand what has been completed and what decisions are approaching.
Concerns should be raised promptly.
Waiting until final handover to discuss something noticed months earlier can make correction considerably more difficult.
Clear communication helps keep expectations aligned throughout the build.
Prepare for Handover
The final stage should include a structured review of the completed property.
Outstanding items should be identified and addressed according to the agreed process.
Homeowners may also receive documentation relating to warranties, equipment, certificates, systems, and maintenance.
Keep these records organized.
They can become important when maintaining the home or making alterations in the future.
A thorough handover marks the transition from construction project to finished home.
Frequently Asked Questions
What is a custom-build home?
A custom-build home is designed and constructed around the requirements of a particular homeowner rather than purchased as an already completed standard property.
How should I choose a custom home builder?
Look at relevant project experience, previous work, project management, communication, quality, scope clarity, and the contractor’s ability to deliver the type of home proposed.
Should I establish my budget before design begins?
Yes. Providing realistic budget information helps the design and construction teams develop proposals that are more likely to be financially achievable.
Why are site surveys important?
Surveys and investigations can identify conditions relating to boundaries, ground, drainage, levels, utilities, and other factors that may affect design and construction.
Can a custom home be more energy efficient?
It can. A new design provides opportunities to consider orientation, insulation, glazing, heating, ventilation, airtightness, and other performance factors from the beginning.
When should I choose finishes?
Many important finishes should be selected before the relevant construction stages begin. Late decisions can delay work or limit available choices.
Should I plan for future accessibility?
Considering future requirements can improve long-term usability, particularly if you intend to remain in the property for many years.
What happens during final handover?
The finished property is reviewed, outstanding items are identified, and relevant documentation such as warranties, certificates, and operating information may be provided.

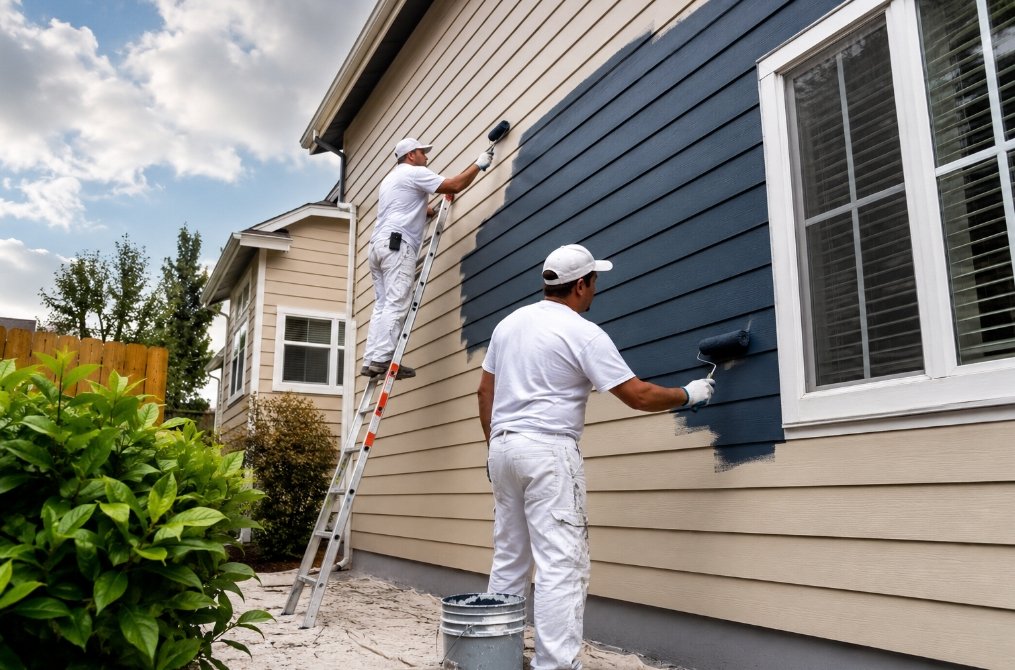
Painting your home can change how every room feels and how the entire property looks from the street. However, interior and exterior painting require different preparation, materials, techniques, and working conditions. Choosing the right approach can help you achieve a cleaner finish and better long term results.
I PAINT STUFF provides professional painting services for homeowners who want careful preparation and consistent workmanship. Whether you are refreshing a bedroom, updating a kitchen, or protecting the outside of your home, understanding the difference between the two types of painting can help you plan your project.
Understanding Interior and Exterior Painting
Interior painting focuses on surfaces inside your home, including walls, ceilings, doors, trim, and other finished areas. The goal is usually to improve appearance while creating a durable surface that can handle everyday use.
Exterior painting has a different purpose. Outdoor surfaces face sunlight, rain, snow, wind, temperature changes, and moisture. Exterior coatings need to withstand these conditions while helping protect materials such as siding, wood, stucco, and trim.
Because the conditions are different, painters cannot simply use the same products and methods indoors and outdoors.
What Interior Painting Involves
A successful interior painting project starts before the first coat goes on the wall. Furniture and flooring should be protected, and surfaces need to be inspected for holes, cracks, stains, peeling paint, or other imperfections.
Depending on the condition of the surface, preparation may include:
- Filling nail holes and small cracks
- Sanding rough areas
- Cleaning walls
- Repairing damaged drywall
- Caulking gaps around trim
- Priming areas that need additional coverage
The type of paint also matters. A bedroom may work well with a low sheen finish, while kitchens, bathrooms, hallways, and other high use areas may benefit from a more washable option.
Professional interior painting services can help you choose products based on the room’s purpose, surface condition, and desired appearance.
What Exterior Painting Requires
Exterior painting demands careful attention to weather and surface conditions. Before painting begins, the exterior should be checked for peeling paint, cracks, damaged wood, mildew, dirt, and areas where moisture may have caused problems.
Preparation may involve pressure washing, scraping loose paint, sanding, caulking, priming, and completing minor repairs.
Timing also matters. Paint needs suitable weather conditions to cure properly. Excessive moisture, extreme temperatures, or rain can interfere with the application and drying process.
A professional exterior painting project can improve curb appeal while adding a protective layer to exposed surfaces.
How I PAINT STUFF Prepares for Each Project
I PAINT STUFF approaches interior and exterior projects according to the needs of the specific surface. The preparation process can make a major difference in the final result.
For interior projects, the focus may include protecting your belongings, preparing walls, repairing imperfections, and creating clean lines around trim, doors, ceilings, and fixtures.
For exterior work, preparation may involve cleaning surfaces, removing failing paint, addressing minor surface problems, and selecting products designed for outdoor exposure.
This difference is important because a good painting job depends on more than applying paint evenly. The surface underneath needs to be ready for the coating.
Choosing the Right Paint and Finish
Paint selection should match the surface and the environment.
For interior walls, homeowners can choose from finishes such as flat, matte, eggshell, satin, and semi gloss. Each finish has different characteristics in terms of appearance, durability, and cleaning.
Exterior paints are formulated to handle outdoor conditions. The right product depends on the material being painted, its existing condition, exposure to the elements, and the desired appearance.
I PAINT STUFF can help homeowners consider these factors before selecting products for their projects. Choosing the right coating can reduce problems and help the finished surface maintain its appearance.
Common Challenges With Interior and Exterior Painting
Interior painting can become difficult when walls have extensive damage, stains, uneven textures, or old layers of paint. Furniture, fixtures, and tight spaces can also make certain areas harder to reach.
Exterior projects have their own challenges. Peeling paint, weathered wood, cracks, mildew, and difficult architectural features can require additional preparation.
Weather can also affect exterior work. A project may need to be adjusted when conditions are unsuitable for proper paint application.
Addressing these issues before painting begins can help prevent visible defects and premature paint failure.
Why Professional Painting Makes a Difference
Painting may appear straightforward, but achieving a professional finish requires preparation, technique, and attention to detail.
Professional painters understand how to prepare different surfaces, select appropriate products, protect surrounding areas, and apply coatings consistently.
Professional help can also save homeowners time. Instead of spending several weekends preparing and painting, you can have a structured process handled by an experienced team.
For larger projects, professional painting can also help maintain consistency across multiple rooms or exterior surfaces.
What to Expect From I PAINT STUFF
When you hire I PAINT STUFF, the project should begin with understanding what your home needs. Different surfaces may require different preparation and paint products.
For interior work, the process can include surface preparation, protection of surrounding areas, painting, detail work, and cleanup.
For exterior projects, preparation is especially important because outdoor surfaces experience constant exposure to changing conditions.
I PAINT STUFF offers painting solutions for homeowners who want to refresh, maintain, or update different areas of their properties. The company also provides services such as cabinet painting, fence staining, deck staining, and drywall repair.
How to Prepare Your Home Before the Painters Arrive
A little preparation from the homeowner can help the project move smoothly.
Before interior painting begins, you can remove small items from the room, clear access to walls, and discuss any areas that need special attention.
For exterior painting, move outdoor furniture, decorations, planters, and other items away from the work area when possible.
It is also helpful to communicate your preferred colors and finishes before the project starts. If you are unsure about a color, testing samples under different lighting conditions can help you make a better decision.
Clear communication with your painting contractor can prevent misunderstandings and keep the project organized.
Final Thoughts
Interior and exterior painting may share the same basic purpose, but the work involved is quite different. Interior projects focus heavily on appearance, clean application, room function, and surface preparation. Exterior projects must also account for weather, moisture, sunlight, and the condition of outdoor materials.
The right preparation and products can make a significant difference in the finished result.
If you are planning a painting project in Colorado, I PAINT STUFF can help you determine what your home needs and develop an appropriate approach for the job. Whether you want to refresh your interior walls, improve your home’s exterior appearance, or update cabinets and outdoor surfaces, choosing a professional painting team can make the process easier and more efficient.
FAQs
What is the difference between interior and exterior painting?
Interior painting focuses on walls, ceilings, trim, and other indoor surfaces. Exterior painting protects outdoor surfaces from weather and moisture.
How often should a home be painted?
Interior paint can last around 5 to 10 years. Exterior paint often lasts 5 to 10 years, depending on the surface and weather exposure.
Does exterior painting require special preparation?
Yes. Exterior surfaces may need cleaning, scraping, sanding, repairs, caulking, and priming before painting.
Can I PAINT STUFF paint both interior and exterior surfaces?
Yes. I PAINT STUFF provides professional interior and exterior painting services for Colorado homeowners.
Why hire professional painters?
Professional painters handle preparation, application, detail work, and cleanup, helping you achieve a consistent and durable finish.



-

 Celebrity1 year ago
Carolin Bacic: Life, Biography, Family, and Legacy
-

 Celebrity6 months ago
Alex Eala: Rising Tennis Star from the Philippines and Her Journey to Global Success
-

 Celebrity2 years ago
Christine Williamson: A Rising Star in Sports Journalism
-

 Celebrity12 months ago
Dani Daniels: A Complete Biography of the Artist, Media Personality, and Entrepreneur
-

 Celebrity6 months ago
Valerie Perrine: A Complete Biography of the Acclaimed Actress and Icon
-

 Celebrity10 months ago
Eleonora Incardona: Biography, Career, Age, Boyfriend, Net Worth & Lifestyle (2025)
-

 Celebrity2 years ago
Vera Davich: Biography, Life, and Legacy2025
-

 Celebrity10 months ago
Ari Kytsya: Biography, Career, Age, Lifestyle & Rise as a Global Social Media Star