
Uncategorized
How to Design a Banner Quickly and Resize It for Every Platform

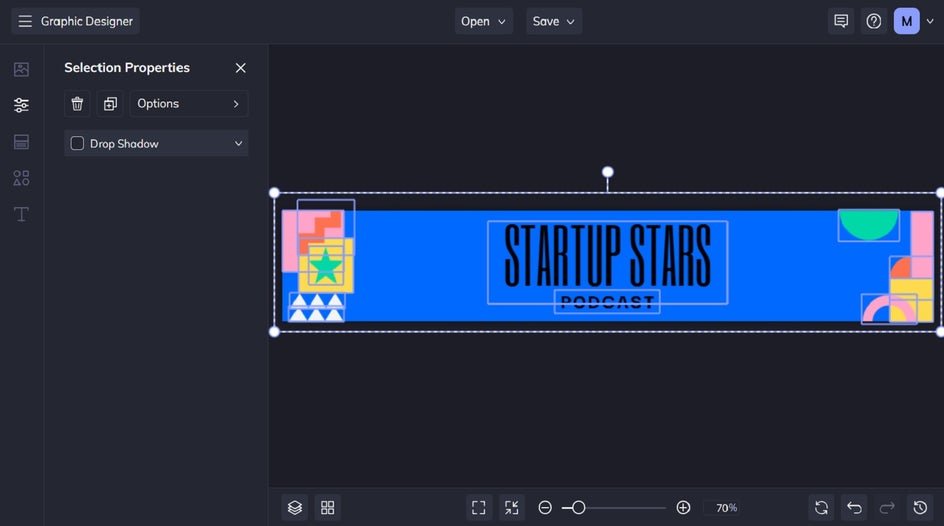
You need a banner. Maybe it is for a YouTube channel, a sale on your website, an event sign that has to be printed by Friday, or a refreshed Facebook cover. The clock is ticking, you do not have a designer on call, and the last thing you want is to wrestle with software that assumes you already know what a bleed margin is. The good news is that a comfortable category of online banner editors now exists for exactly this situation, and the best of them combine a comprehensive editor for full creative control with quick edits and one click resizing so you can adapt a single design to every place it needs to live.
This guide walks through what to look for in that kind of editor, how to use one efficiently, and the small habits that make banner design feel almost easy. No prior design experience required.
What a Comprehensive Banner Editor Actually Gives You
When people search for a comprehensive banner editor, they usually mean something a little contradictory. They want the depth of a real design app, with layers, fonts, alignment guides, and brand controls, but they also want the speed of a simple online tool that does the hard parts automatically. The strongest banner editors in the market today bridge that gap. They open in a browser, save your work in the cloud, and offer two parallel ways to work: deep editing when you have time, and one click quick edits when you do not.
The hallmark features to look for include a large library of editable templates organized by use case, drag and drop image and text controls, a built in resize tool that converts a single design into different platform sizes, free stock photos and icons, brand kit storage so your logo and colors stay consistent, and a few smart automations like background removal and AI generated artwork. If a tool checks those boxes, you can build, adapt, and publish a professional banner in a fraction of the time it would take in traditional design software.
The other quiet benefit is that you can iterate. A great banner is rarely the first version you publish. When the editor is fast and forgiving, you can try three layouts, get a teammate to react, swap a photo, and ship the winning option without burning an afternoon. That is the real reason ease of use matters. It is not just about saving time on a single banner. It is about giving yourself the freedom to make the banner better.
Eight Practical Tips for Faster, Better Banner Design
Below are the habits that consistently shave hours off banner projects and produce better results, especially if you do not consider yourself a designer.
1. Start from a template instead of a blank canvas
Blank canvases are intimidating, and they almost always slow you down. A good banner editor will offer thousands of pre built templates sorted by purpose, holiday, industry, and platform. Pick one that is roughly in the right shape and tone, then change the words, colors, and images to make it yours. You are not cheating by using a template. You are skipping the part of design that has nothing to do with your specific message.
The added benefit is that templates are typically built with correct dimensions and safe margins for their target platform. That means your banner will not get awkwardly cropped on a phone or pixelated on a YouTube channel art display. When you do not have to second guess the layout, you can focus on the content.
2. Use a true one click resize tool to repurpose a single design
The single biggest time saver in modern banner editing is the resize feature. Build your banner once, then convert it to every other size you need with a click. A web banner becomes an Instagram post, a YouTube channel art image becomes an X header, a horizontal sale banner becomes a vertical story. You do not redraw anything. The tool intelligently rescales your layout and keeps the focal point in view.
This is the difference between launching a campaign in an hour and launching it in a day. If you are publishing across multiple channels, do not pick a banner editor that lacks this feature. Even if you only need one banner today, you will eventually need a different size, and you will be glad you can produce it without rebuilding.
3. Build a brand kit so every banner looks like it belongs to you
If you have a logo, two or three brand colors, and a couple of fonts you like, save them in the editor as a brand kit. Once they are saved, every new banner you start gives you those assets in a single click. You stop second guessing whether the blue is the right blue. You stop hunting for the logo file. Your banners start to look like a coherent brand instead of a series of unrelated images.
For people running a small business or a personal channel, this is the single best long term investment you can make in your design workflow. The first banner takes a little extra time as you set everything up. Every banner after that is dramatically faster.
4. Try the Adobe Express banner creator for end to end speed
Here is a practical walk through using Adobe Express for a banner from start to finish. Open the banner creator in a browser. You do not need to download anything. Pick a starting point, either a template that looks close to what you have in mind or a blank canvas if you want full control. Drop in your photo or use the built in stock library to find one. Edit the headline by clicking it and typing your own message. Use the color picker to match your brand, or upload your logo to drop it into the corner. If the photo has a busy background, click it once and use the remove background quick action to clean it up in seconds.
When the design is finished, click resize and choose every platform you need, from a web banner to a social cover to a printable size. You can download a PNG, a JPG, or a print ready PDF. Save the project so you can revisit it for the next campaign. The whole process, for a confident first time user, takes under fifteen minutes.
5. Use AI generation when you cannot find the right image
Sometimes the photo you need does not exist in any stock library. A burger floating in space. A laptop made of flowers. A specific kind of texture in your brand color. Modern banner editors include text to image generators that produce custom artwork from a written description. This is wildly useful for banners that need to feel original or that have an unusual concept.
A short tip on prompting. Be specific about subject, style, lighting, and color. Phrases like soft natural light, flat illustration style, pastel color palette, or photorealistic close up dramatically improve results compared to vague prompts. If the first image is not right, regenerate or refine the description. It still beats spending two hours on a stock photo site.
6. Keep the text minimal and the message obvious
The most common mistake in banner design is too much text. Banners are seen at a glance, often on a small screen, often by someone who is half paying attention. The most effective banners have a single short message and one clear call to action. If you are tempted to add a third line of fine print, ask yourself whether anyone will actually read it. Usually the answer is no.
A useful test is the squint test. Squint at your banner from a few feet away. Can you still read the headline? Is it clear what you are advertising or announcing? If the answer is yes, you are in good shape. If the answer is no, simplify until it works.
7. Save your finished banners as reusable templates
After you spend the time to make a banner you love, turn it into a template you can reuse. Most editors make this a single click. The next time you have a similar promotion or announcement, you open the template, change the photo and the dates, resize for your platforms, and publish. What used to be a fresh design project is now a fifteen minute update.
This habit compounds. After six months of saving your work as templates, you have a small library of branded banner templates for every recurring need: monthly sales, event announcements, new product launches, holiday promotions. You stop starting from scratch.
8. Add gentle motion to digital banners when the platform allows it
Static banners work fine. Animated banners get more attention. If your banner will live on a digital platform that supports motion, like a website or certain social feeds, consider adding a small animation. A headline that fades in. A subtle zoom on the background. An arrow that nudges toward the call to action. A good banner editor includes pre built animation options that take seconds to apply.
The keyword here is gentle. Aggressive flashing or rapidly changing animations are tiring and often counterproductive. The goal is to draw the eye, not to demand it. Use motion as a quiet enhancement.
Quick Edits That Make a Banner Look Polished
Beyond the full design workflow, the quick edit features in modern banner editors are worth knowing on their own. They handle the small fixes that used to require professional software.
The most useful are background removal, which isolates a subject from a busy photo in one click. Image cropping and resizing without quality loss. Text effect generation, which turns plain words into shadowed, textured, or styled headlines. Color matching, which can sample colors from your photo and apply them across the banner. Object removal, which lets you erase distractions from a photo. And conversion between formats, like turning a JPG into a PNG with a transparent background.
You do not need to remember which tool does what. The editor surfaces these as quick actions when they are relevant. The point is to know they exist so you can reach for them when something in your banner is not quite right. A photo that almost works is fine. A great banner editor turns it into a photo that does work.
Resizing Without Starting Over
Resizing deserves its own short section because it is the feature that separates frustrating banner workflows from pleasant ones. Here is the typical experience without a smart resize feature: you build a banner at one size, then manually rebuild it at every other size, repositioning every element, retyping every line of text, exporting separately. A campaign with five banner sizes takes five times the work.
Here is the experience with a smart resize feature: you build the banner once. You click resize. You select every size you need from a list of preset platform dimensions, or you enter custom numbers. The editor produces all the variations in seconds. You spot check each one, nudge a logo if it landed in an awkward spot, and download. A campaign with five banner sizes takes a few minutes more than a campaign with one. This is the feature that makes banner editors feel modern.
Frequently Asked Questions
What dimensions should I use for different banner placements?
Dimensions vary widely by platform and use case, which is why a banner editor with preset sizes saves so much guesswork. Common ones include 2560 by 1440 pixels for YouTube channel art, 1500 by 500 pixels for an X header, 851 by 315 pixels for a Facebook cover, 1584 by 396 pixels for a LinkedIn cover, and roughly 1200 by 1000 pixels for a typical web banner ad. Printed banners are usually measured in inches and depend on the size of the space they will hang in. A standard event banner might be 72 by 36 inches. The simplest approach is to choose your destination first, let the editor select the correct dimensions, and design within them. If you want to schedule those banners for posting after they are designed, a publishing tool like Buffer makes it easy to queue them up across multiple social accounts at once.
Do I need design experience to make a banner that looks professional?
No, and this is the central promise of modern banner editors. They are explicitly built for non designers. Templates handle the layout and proportion decisions for you. Brand kits keep your colors and fonts consistent. Quick actions handle the technical photo work. Your job is to bring the message and the brand. The tools handle most of the craft. The single most important habit, if you are new, is to keep things simple. One headline, one image, one call to action, one clear reason for someone to look. That is what good banners do, and it is much easier to execute than trying to fit five things on the canvas.
Can I print my digital banner for an in person event?
Yes. The key is to choose a banner editor that supports high resolution exports, ideally as a PDF, and to design at the dimensions of the printed piece from the start. If you build a small social banner and then try to scale it up to a six foot trade show backdrop, the image will be blurry. If you start at print dimensions, the export will be sharp. Most banner editors include preset sizes for common print formats, and many also offer direct print services so you can order the finished banner without leaving the app.
How do I make sure my banner does not look like everyone else’s?
Templates are starting points, not finished products. The fastest way to make a banner feel generic is to use a template without changing anything. The fastest way to make it feel like yours is to swap in your own photos, apply your own brand colors, replace the stock fonts with the fonts you actually use, and rewrite the placeholder copy in your real voice. A few minutes of customization makes an enormous difference. Beyond that, consider what makes your brand specific. A particular color, a recurring shape, a photographic style, a tone of voice. Apply that consistently across every banner you make, and your work will start to feel recognizable.
Can I edit my banner from my phone?
Most leading banner editors, including the one featured in this guide, offer a mobile app with the same core editing tools as the desktop version. You can start a banner on your laptop, finish it on your phone, and download or share without missing a beat. This is genuinely useful for last minute changes, on the go updates, or moments when you remember a typo right after you publish. Cloud sync keeps the project up to date no matter which device you are using, so you do not have to think about saving and transferring files.
Wrapping Up
Designing a banner used to be a project. With a comprehensive editor that combines deep editing tools, one click quick edits, and intelligent resizing, it is now a quick task that almost anyone can handle. The core formula is simple. Start from a template. Customize with your own brand. Use quick actions to clean up the small stuff. Resize for every platform you need. Save your finished design as a reusable template for next time.
If you focus on clear messaging, consistent branding, and the small list of habits in this guide, you will produce banners that look professional without having to think of yourself as a designer. The tools have caught up with the rest of us. The hard part is no longer the software. It is just deciding what you want to say.


Bedroom furniture has always had to balance two important requirements: practical storage and visual appeal. As modern homes become more compact and multifunctional, this balance has become even more significant. Wardrobes, in particular, occupy a considerable amount of space within a bedroom, meaning their design can influence both organisation and the overall appearance of the room.
Neutral furniture colours have become increasingly popular because they can adapt to changing interior styles. Among these choices, a grey wardrobe offers a versatile approach to bedroom storage while fitting naturally into a variety of contemporary interiors.
Why Neutral Colours Remain Popular
Interior design trends come and go, but neutral colours tend to remain relevant because of their flexibility. Grey occupies a particularly interesting position between lighter and darker tones. Depending on the shade, it can create either a soft and understated appearance or a stronger visual presence.
This adaptability allows grey furniture to work with many different colour palettes. It can be paired with white walls and light flooring for a simple appearance or combined with darker colours for a more dramatic bedroom.
The Wardrobe as a Major Design Element
A wardrobe is rarely a small piece of furniture. Because of its size, it often becomes one of the most visually prominent elements in a bedroom.
Its doors, handles, finish, and proportions can therefore affect the character of the entire room. Selecting a wardrobe that complements the surrounding furniture can help create a more cohesive appearance.
The colour is particularly important because large surfaces tend to have a greater visual impact than smaller decorative pieces.
Storage and Everyday Organisation
The primary purpose of a wardrobe remains storage. Clothing, coats, accessories, and other personal belongings need to be kept in a way that allows them to remain accessible without creating unnecessary clutter.
Modern wardrobes can include different combinations of hanging rails, shelves, drawers, and compartments. The most suitable arrangement depends on individual storage habits and the type of clothing being kept.
A well-organised internal layout can make daily routines easier by ensuring frequently used items are accessible while less frequently used belongings remain neatly stored.
Adapting to Different Bedroom Styles
Grey furniture can work across a surprisingly broad range of interior styles. In contemporary bedrooms, it can contribute to a clean and sophisticated appearance. In more traditional rooms, softer shades of grey can provide a subtle alternative to white or natural wood.
The surrounding materials also influence how the colour appears. Wooden flooring, patterned textiles, metallic details, and upholstered furniture can all create different visual relationships with grey.
This makes the colour suitable for homeowners who may want to change other elements of their bedroom without replacing their main storage furniture.
Considering Bedroom Size
The size of the room should be considered alongside the wardrobe’s appearance. In a smaller bedroom, a large wardrobe can dominate the available space, making careful planning particularly important.
The location of doors, windows, beds, and other furniture should be considered before deciding where a wardrobe will be positioned. Adequate clearance is also necessary to ensure doors and drawers can be used comfortably.
Good planning can make even substantial storage furniture feel integrated into the room.
Furniture That Can Adapt Over Time
Bedrooms often change as people’s needs develop. A room may be redecorated, furniture may be rearranged, or storage requirements may increase.
Neutral furniture can be useful in this context because it does not necessarily dictate the rest of the colour scheme. A grey wardrobe can remain compatible with different decorative choices, allowing other elements of the bedroom to evolve around it.
The Future of Bedroom Storage
Modern wardrobe design continues to move toward greater storage efficiency, flexible internal arrangements, and adaptable aesthetics. Homeowners increasingly expect furniture to provide substantial capacity while maintaining a clean appearance.
The popularity of grey illustrates this broader trend. Rather than choosing furniture purely for its practical function, people are increasingly considering how large storage pieces contribute to the overall atmosphere of a room.
A grey wardrobe therefore represents more than a colour preference. It reflects the continuing development of bedroom furniture toward designs that combine organisation, adaptability, and contemporary interior styling.


Staying on top of rules and regulations can feel like a full-time job for any business. From data protection laws to environmental standards, the web of compliance obligations grows more complex every year. For many organisations, this means dedicating huge amounts of time and resources just to avoid breaking the law. However, artificial intelligence is emerging as a powerful ally, offering a way to manage these challenges more efficiently and proactively.
The Growing Compliance Challenge
The sheer volume and pace of regulatory change are staggering. New laws are introduced, old ones are updated, and guidance is constantly being revised across local, national, and international jurisdictions. Manually tracking these changes is a monumental task, prone to human error. A missed update or a misinterpreted rule can lead to significant fines, reputational damage, and operational disruption. For businesses operating in multiple markets, this complexity multiplies, creating a significant barrier to growth and innovation. The challenge is no longer just about knowing the rules, but about anticipating how they will evolve.
AI for Proactive Risk Management
Traditionally, compliance has been a reactive discipline. An organisation might only discover a problem after a breach has occurred or during an audit. AI helps flip this script, enabling a proactive approach to risk management. AI-powered systems can analyse vast amounts of internal and external data to identify patterns and anomalies that could signal a potential compliance risk. This includes everything from employee communications to transaction records. Spotting these red flags early helps you address issues before they escalate. This forward-looking approach is enhanced by regulatory horizon scanning, which systematically monitors upcoming legislative and regulatory changes that could affect your business, giving you more time to assess their potential impact and prepare.
Automating Regulatory Updates
One of the most immediate benefits of AI in compliance is that it automates monitoring and updates. Instead of having teams of people manually checking dozens of government websites and regulatory publications, an AI platform can do it for you. These tools can monitor large numbers of regulatory sources, flagging relevant changes based on an organisation’s industry and geographical footprint. When a new regulation is proposed or an existing one is amended, the system can automatically alert the relevant people in your organisation, provide summaries of the changes, and even suggest initial action steps. This kind of proactive approach also complements other compliance measures, such as online document verification, which can help businesses identify verification gaps and strengthen their regulatory processes. This frees up your compliance team from tedious administrative work, allowing them to focus on more strategic tasks. There are many key AI applications in compliance that streamline these processes.
Beyond Financial Services
While the finance and banking sectors were early adopters of AI for compliance due to their heavy regulatory burden, the technology’s application is far broader. Any industry subject to rules and standards can benefit. For example:
- Healthcare: AI can help ensure compliance with patient data privacy laws like GDPR and manage clinical trial reporting.
- Retail: It can monitor for changes in consumer protection laws, product safety standards, and advertising regulations.
- Manufacturing: AI tools can track environmental regulations, supply chain ethics, and workplace safety requirements.
The underlying principles are the same regardless of the sector. The goal is to reduce manual effort, improve accuracy, and gain a clearer picture of compliance requirements across industries.
Choosing the Right Tools
When considering an AI-powered compliance solution, remember it’s not a one-size-fits-all situation. The right tool for your business will depend on your specific needs, industry, and scale. First, consider whether you need a solution tailored to a specific regulation, like data privacy, or a broader platform that covers multiple areas. Look for tools that can easily integrate with your existing software and systems to ensure a smooth flow of information. Scalability is also key; you need a solution that can grow with your business as you expand into new markets. Finally, prioritise platforms that offer clear, customisable dashboards and reporting, so you can easily understand your compliance posture at a glance.
AI is transforming compliance from a costly, reactive burden into a strategic, proactive function. By automating monitoring and providing predictive insights, these tools empower businesses to not only meet their current obligations but also to prepare for the challenges of tomorrow.
Uncategorized
Hydrogenation Reactors in Industrial Process Plants: Design, Selection, and Integration


In the world of chemical processing, few unit operations carry as much technical weight as hydrogenation. From pharmaceutical synthesis to edible oil refining and petrochemical upgrading, the ability to introduce hydrogen into a reaction system under controlled conditions is fundamental to producing high-quality, consistent end products. Selecting the right equipment, understanding the engineering principles behind it, and integrating it effectively into a broader process line are decisions that can define the efficiency and safety of an entire facility. This article explores the key considerations surrounding hydrogenation reactor technology, filtration compatibility, and fluid transfer systems that together form the backbone of a well-engineered process plant.
Understanding the Role of Hydrogenation in Modern Industry
Hydrogenation is a chemical reaction in which hydrogen gas is added to a compound, typically in the presence of a catalyst, under elevated temperature and pressure. The applications span an enormous range of industries. In food processing, hydrogenation converts liquid vegetable oils into semi-solid fats. In pharmaceuticals, it is used to reduce double bonds and functional groups in active pharmaceutical ingredients. In petrochemicals, it removes sulfur, nitrogen, and other impurities from crude oil fractions. In each of these contexts, the reactor vessel itself must be engineered to handle the specific demands of the process — including pressure ratings, catalyst compatibility, heat transfer requirements, and material selection.
The engineering complexity of hydrogenation is not to be underestimated. Hydrogen is a highly flammable gas with a wide flammability range, and reactions often occur at pressures exceeding 100 bar. This places strict demands on vessel integrity, sealing systems, instrumentation, and safety relief mechanisms. A poorly specified reactor is not just an operational liability — it is a safety risk.
Key Design Parameters for Hydrogenation Reactor Selection
Pressure and Temperature Ratings
The operating envelope of a hydrogenation reactor is defined primarily by its pressure and temperature ratings. High-pressure reactors must be fabricated from materials capable of withstanding hydrogen embrittlement — a phenomenon where hydrogen atoms diffuse into the metal lattice and reduce ductility. Stainless steel grades, chrome-molybdenum alloys, and nickel-based materials are commonly specified depending on the severity of the service conditions. Temperature control is equally critical, as exothermic hydrogenation reactions can lead to runaway conditions if heat removal is inadequate.
Catalyst Management and Reactor Configuration
Catalyst selection and management are central to reactor performance. Fixed-bed reactors are widely used in continuous processes where the catalyst remains stationary and the reactant stream flows through. Slurry reactors, on the other hand, suspend catalyst particles in the liquid phase and are common in batch pharmaceutical applications. Trickle-bed reactors combine gas and liquid flow over a fixed catalyst bed and are frequently used in hydrodesulfurization. Each configuration has distinct implications for mass transfer, catalyst lifetime, pressure drop, and downstream separation requirements.
Filtration Systems: A Critical Downstream Consideration
Once a hydrogenation reaction is complete, the product stream typically requires separation from catalyst fines, particulate matter, and unreacted gases. This is where filtration technology becomes indispensable. The choice between different filter types can significantly affect product purity, catalyst recovery rates, and overall process economics. When evaluating options, process engineers often compare sintered filters against traditional filtration media to determine which offers the best combination of particle retention, chemical resistance, and cleanability for their specific application.
Sintered metal filters, in particular, have gained traction in high-pressure, high-temperature hydrogenation environments because they can withstand aggressive conditions that would destroy polymer-based filter elements. Their rigid structure also allows for backwashing and regeneration, reducing consumable costs over the long term. Traditional depth filters and cartridge systems, while effective in lower-severity applications, may not offer the mechanical robustness required in continuous hydrogenation service.
Fluid Transfer and Pump Selection in Hydrogenation Systems
Why Pump Technology Matters
Fluid transfer is another area where engineering decisions have a direct impact on process performance. In pharmaceutical hydrogenation, where product purity and contamination control are paramount, the selection of pumping technology must account for the chemical compatibility of wetted materials, the sensitivity of the product to shear, and the need for accurate flow metering. Peristaltic pumps are frequently used in these contexts because they offer gentle, pulsatile flow without the product contacting any metal surfaces other than the tubing itself.
However, the performance of a peristaltic pump is only as reliable as the tubing it uses. Tubing selection involves careful consideration of chemical resistance, pressure rating, temperature tolerance, and the frequency of replacement cycles. For those working in regulated pharmaceutical environments, guidance on selecting and installing peristaltic pump tubing is an essential reference for ensuring both compliance and operational continuity.
Integration with Reactor Feed and Product Lines
In a complete hydrogenation system, pumps serve multiple roles: feeding reactants into the reactor, circulating catalyst slurries, transferring product to downstream processing, and handling waste streams. Each of these duties may require a different pump type and specification. Centrifugal pumps are common for high-flow, low-viscosity streams, while positive displacement pumps are preferred for accurate metering of catalysts or reagents. Proper pump selection, combined with appropriate instrumentation and control systems, ensures that the reactor operates within its design envelope at all times.
International Process Plants: Expertise in Hydrogenation Equipment
For process engineers and procurement specialists seeking reliable, high-specification equipment, sourcing from experienced suppliers is essential. A well-specified hydrogenation reactor must meet not only the technical demands of the process but also regulatory requirements, material traceability standards, and documentation expectations that are increasingly stringent across industries. International Process Plants offers a broad inventory of used and refurbished process equipment, including hydrogenation reactors suited to a wide range of applications and capacities. Their equipment undergoes thorough inspection and documentation, making them a credible source for facilities looking to expand or replace existing assets without the lead times associated with new fabrication.
Sourcing pre-owned process equipment from a reputable supplier can offer significant capital savings while maintaining the technical integrity required for safe and efficient operation. This approach is particularly valuable for pilot plants, capacity expansions, or facilities operating in cost-sensitive markets.
Conclusion: Building a Reliable Hydrogenation Process
A successful hydrogenation process is the result of careful engineering decisions made across multiple disciplines — reactor design, catalyst management, filtration, fluid transfer, and instrumentation. No single component operates in isolation, and the performance of the overall system depends on how well each element is specified and integrated with the others. Whether you are designing a new facility from the ground up or upgrading an existing process line, taking a holistic view of the entire system — from the reactor vessel to the downstream filter and the pump tubing — is the most effective way to ensure long-term reliability, safety, and product quality.
As industries continue to demand higher purity standards, tighter process control, and greater energy efficiency, the engineering community must stay current with advances in reactor technology, filtration media, and fluid handling systems. Investing in the right equipment and the right expertise at the outset is always more cost-effective than addressing failures and inefficiencies after commissioning.



-

 Celebrity1 year ago
Carolin Bacic: Life, Biography, Family, and Legacy
-

 Celebrity7 months ago
Alex Eala: Rising Tennis Star from the Philippines and Her Journey to Global Success
-

 Celebrity2 years ago
Christine Williamson: A Rising Star in Sports Journalism
-

 Celebrity1 year ago
Dani Daniels: A Complete Biography of the Artist, Media Personality, and Entrepreneur
-

 Celebrity7 months ago
Valerie Perrine: A Complete Biography of the Acclaimed Actress and Icon
-

 Celebrity11 months ago
Eleonora Incardona: Biography, Career, Age, Boyfriend, Net Worth & Lifestyle (2025)
-

 Celebrity2 years ago
Vera Davich: Biography, Life, and Legacy2025
-

 Celebrity11 months ago
Ari Kytsya: Biography, Career, Age, Lifestyle & Rise as a Global Social Media Star