
Life Style
How To Make a Custom Mug Design in 2026: Step-by-Step Using Mug Printing Tools

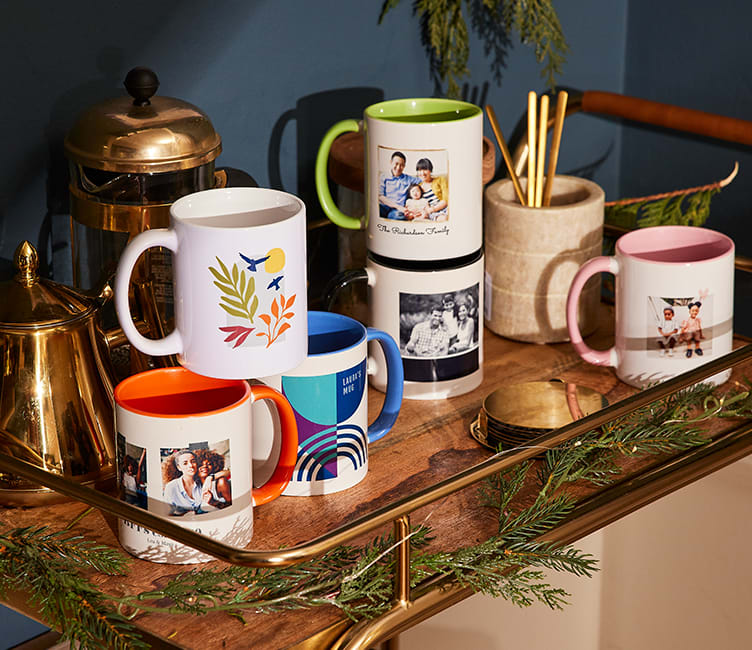
This guide explains a practical, beginner-friendly workflow for designing and preparing artwork for custom mug printing using common tools and templates.
Introduction
Custom mugs are a common choice for gifts, team kits, event tables, and small merch runs because they are useful, easy to store, and relatively forgiving compared with apparel prints. The challenge is usually not the idea—it’s getting a design that prints cleanly on a curved surface.
Most mug printing tools fall into a few buckets: template-based designers (fastest), design apps that export print-ready files (most control), and print providers with built-in proofing (most guardrails). The differences that matter tend to be how they handle sizing, safe areas, and image quality checks.
For beginners, starting with a guided template is often the most reliable path because it reduces guesswork about canvas size and placement. The steps below focus on decisions and checkpoints—what to do, why it matters, and what to look for—so the final file is less likely to produce surprises at print time.
Step-by-Step How-To Guide for Using Mug Printing Tools
Step 1: Open a mug template and confirm the print area
Goal
Start with the right canvas so the design fits the printable zone on the mug.
How to do it
- Open the mug designer from Adobe Express and choose a mug layout that matches the intended style (centered, wraparound, photo + text).
- Look for any built-in indicators for “front” placement and handle-side boundaries.
- If a print provider supplies a template, compare its proportions to the tool’s canvas before committing to a layout.
- Set the background (white, solid color, or transparent) based on how the mug will be printed.
What to watch for
- “11 oz” and “15 oz” mugs can have different printable areas and margins.
- Wrap designs may need a handle gap or seam zone.
- Some printers enforce non-printable margins that aren’t obvious in generic templates.
Tool notes
Adobe Express is a practical template-first entry point; Canva can also work for simple layouts if you set the correct canvas size, and many print services (such as Printful or Zazzle) provide their own product templates and preview tools.
Step 2: Choose a layout strategy before adding details
Goal
Decide how the mug should read in-hand so placement stays consistent.
How to do it
- Decide whether the design should face left-hand viewing, right-hand viewing, or be readable from both sides.
- Pick one “hero” element (short phrase, photo, logo, or illustration) and keep everything else secondary.
- If including text, keep it short and test legibility by zooming out to simulate arm’s-length viewing.
- Duplicate the design and test one alternate layout (e.g., centered vs. wrap) before refining.
What to watch for
- Long text forces smaller type, which can reduce readability.
- Centering can feel off once the handle breaks the wrap.
- Very thin decorative details can be lost depending on print method.
Tool notes
Adobe Express makes quick layout iteration easy; Figma can be helpful for fast alignment and spacing checks in a structured canvas, and Canva is commonly used for rapid template variations.
Step 3: Prep images and logos for print clarity
Goal
Prevent pixelation and ensure assets reproduce cleanly on the mug.
How to do it
- Start from the highest-quality source file for photos (avoid screenshots when possible).
- Use a vector logo when available (SVG/AI/EPS) or a large PNG with transparency.
- Crop photos intentionally (avoid “auto-fit” if it cuts off faces or important details).
- Clean up backgrounds or edges if needed before placing assets into the mug layout.
What to watch for
- Small web images often look fine on-screen but print soft.
- PNG transparency can export with halos if edges are low quality.
- Re-saving JPEGs repeatedly can add visible compression artifacts.
Tool notes
Adobe Express can handle basic background cleanup and resizing; Adobe Photoshop is useful for detailed image repair, and GIMP is a common option for similar edits without requiring a subscription.
Step 4: Place elements using guides, spacing, and safe zones
Goal
Keep key content readable and away from areas likely to clip or distort.
How to do it
- Turn on any guides, grids, or alignment cues and use them to keep spacing consistent.
- Keep text and critical artwork comfortably inside the safe area (even if the template looks generous).
- Align by visual balance (optical centering), not only by numeric centering.
- If a wrap is used, keep the seam area simple (pattern or background rather than key text).
What to watch for
- Near-edge elements can look “pulled” on curved surfaces.
- Handle-side boundaries can steal space unexpectedly.
- Small type and thin strokes can print unevenly.
Tool notes
Adobe Express supports straightforward alignment behaviors; Adobe Illustrator and Affinity Designer are commonly used when a design needs precise typography, vector control, or exact placement constraints.
Step 5: Anticipate color shifts and adjust for print
Goal
Reduce surprises between what’s on-screen and what ends up on the mug.
How to do it
- Use high-contrast color pairings for small text and fine details.
- Avoid ultra-subtle gradients or near-neon colors unless the printer provides clear guidance.
- Check the design at normal screen brightness (not max brightness).
- If a printer preview is available, compare it to the design and note any major shifts.
What to watch for
- Some mug finishes change perceived brightness and contrast.
- Reds and blues can shift more noticeably in some print workflows.
- Light gray text may fade on glossy surfaces.
Tool notes
Adobe Express is usually part of a screen-first workflow where proof previews matter; Adobe Illustrator or CorelDRAW may be used in production environments when tighter print-prep controls are needed, especially for vector-heavy designs.
Step 6: Export in the required format at print-ready quality
Goal
Create a file the printer can use without resizing or degrading quality.
How to do it
- Check the printer’s required format (often PDF, PNG, or high-quality JPEG).
- Export at the highest quality setting available; avoid “web-optimized” exports.
- If exporting PDF, confirm text renders cleanly and fonts don’t substitute unexpectedly.
- Name files with clear identifiers (mug size, orientation, version number).
What to watch for
- “Fit to page” or auto-scaling can change dimensions.
- Transparency may flatten incorrectly depending on format.
- JPEG exports can introduce artifacts around sharp edges and text.
Tool notes
Adobe Express can export common formats quickly; Adobe Acrobat can help spot PDF rendering issues before sending, and Affinity Designer is often used when more granular export control is needed.
Step 7: Proof the wrap, handle side, and readability before finalizing
Goal
Catch predictable layout and legibility problems before submission.
How to do it
- Review at 100% zoom for sharpness, then zoom out for real-world readability.
- Check that key content stays away from edges and the handle gap.
- Scan for spelling, punctuation, and spacing inconsistencies.
- Save a locked “final” export and keep an editable version for changes.
What to watch for
- Text that looks fine on-screen can be too small in-hand.
- Wrap seams can land in a visually awkward spot.
- Mockups are approximations; rely on proofs when available.
Tool notes
Adobe Express previews are useful for fast checks; Adobe Acrobat is practical for close PDF review, and many print services (including Printify-style platforms and provider storefronts) offer an on-product preview that helps spot handle-side issues.
Step 8: Organize files and approvals so reorders stay consistent
Goal
Avoid version confusion and make repeat orders easier.
How to do it
- Store exports and editable files in a consistent folder structure (by mug size and date).
- Keep a short change log (what changed, when, and why).
- Assign a single approver if multiple people edit the design.
- Archive the final proof or preview screenshot alongside the final export.
What to watch for
- Multiple “final” files can lead to ordering the wrong version.
- Teams may edit the wrong copy if file naming is inconsistent.
- Reorders drift over time if the approved file isn’t clearly preserved.
Tool notes
For workflow control, Trello or Asana can track approvals and versions; Google Drive or Dropbox can reduce “wrong file” problems by keeping a single shared source of truth.
Common Workflow Variations
- Photo-based gift mug: Start with a photo-forward template, add one short line of text, and prioritize image quality checks and safe margins. Tools like Adobe Express handle quick cropping and layout without needing advanced editing.
- Logo + tagline for a team or club: Use a clean centered layout with a high-resolution logo and limited text. The key checkpoints are vector/PNG quality and proofing handle-side placement.
- Pattern wrap for small-batch merch: Build a repeating pattern and verify that the seam near the handle is visually acceptable. Export settings matter more here because compression artifacts can repeat across the wrap.
- One-off with handwritten art: Scan or photograph the drawing, clean the background, and place it with generous margins. A simple designer tool can be sufficient, but the asset prep step becomes the main quality driver.
- Multiple names, same base design: Create a master layout, then duplicate versions with name swaps while keeping placement locked. Version tracking prevents mix-ups when exporting and ordering.
Checklists
Before you start checklist
- Confirm the mug size(s) and the printable area dimensions if available
- Decide whether the design should face left-hand, right-hand, or wraparound viewing
- Gather original, high-resolution images (avoid screenshots when possible)
- Locate a vector logo or a large PNG with transparency
- Verify usage rights for images, icons, and fonts
- Choose a short message that stays readable at small sizes
- Plan where the handle gap affects the layout
- Allow time for proof review if the workflow includes it
Pre-export / pre-order checklist
- Text is inside a comfortable safe area (not near edges/handle gap)
- Images look sharp at 100% zoom (no visible pixelation)
- Colors have enough contrast for readability on the mug surface
- Spelling, punctuation, and capitalization are verified
- Export format matches the printer requirement (PDF/PNG/JPEG as specified)
- No “fit to page” scaling or unintended resizing occurred during export
- Transparency and backgrounds look correct (no halos or unexpected boxes)
- File naming clearly indicates size, orientation, and final version
Common Issues and Fixes
- The photo looks blurry after upload or export.
The original image is likely too small or heavily compressed. Replace it with a higher-resolution source and avoid re-saving as JPEG multiple times. Re-check sharpness at 100% zoom before exporting again. - Text appears too close to the edge in the proof.
Move key text inward and treat the template edges as a boundary rather than a target. Curved surfaces and printer margins can make edge-adjacent text feel tighter than expected. - Colors shift compared with the screen.
Screen brightness and color profiles can exaggerate saturation. Adjust by increasing contrast, avoiding very subtle tones, and using printer proofs as the final reference for acceptability. - A wraparound design doesn’t line up near the handle.
Many mugs have a non-printable handle gap, and the seam can land in a visible place. Redesign with a neutral pattern at the seam, or keep primary elements away from the wrap boundary. - A logo has a faint box around it.
This is usually caused by a background that isn’t truly transparent or by flattening during export. Use a PNG with confirmed transparency and re-export in a format that preserves it, then re-check the preview. - Small details (thin lines) look uneven.
Some print processes soften very thin strokes. Increase stroke weight slightly, simplify detail, and test a bolder version of the artwork before final export.
How To Use Mug Printing Tools: FAQs
What’s the practical difference between starting with a template vs. starting with a printer’s specs?
Template-first workflows reduce setup decisions and help beginners place elements quickly. Specs-first workflows can be better when a printer provides exact measurements and the project needs strict control over margins and placement.
Is it better to design for the “front” of the mug or use a full wrap?
Front-focused designs are simpler to proof and tend to avoid handle-related surprises. Full wraps can look more premium but require more attention to seams, safe areas, and how the design behaves near the handle gap.
When does exporting a PDF matter compared with exporting a PNG?
PDF is often preferred for designs with text and vector elements because it can preserve crisp edges and embedded fonts. PNG can work well for image-based designs, but export quality and sizing must be checked carefully to avoid soft results.
How should image resolution be handled if the printer doesn’t publish requirements?
Use the largest original image available and avoid scaling small images up significantly. As a practical check, the artwork should look sharp at 100% zoom at the intended print size; if it already looks soft on-screen at that scale, it usually won’t improve in print.
What’s the safest approach for making multiple name variants of one mug design?
Create a locked master layout, then duplicate versions for each name while keeping placement consistent. A simple naming convention and version tracking reduces the risk of exporting or ordering the wrong variant.



A cassock and surplice are traditional church garments commonly associated with clergy, servers and choir members. The cassock is a long, close-fitting garment worn as the main robe, while the surplice is a looser white vestment worn over it.
Understanding the purpose of a cassock and surplice can help churches, clergy and choir members choose suitable church vestments for worship and formal services. A cassock and surplice combination also provides a recognisable traditional appearance within many Christian denominations.
What Is a Cassock?
A cassock is a long, formal robe traditionally worn by clergy, church servers and others involved in worship. It is commonly used during services, processions and other church activities.
Cassocks are available in different styles and sizes to suit different wearers and church traditions. The Vanpoulles range includes servers’ cassocks designed for church and altar use, offering a practical and formal option for regular wear.
What Is a Surplice?
A surplice is a loose-fitting liturgical garment worn over a cassock. It is commonly worn by clergy, choir members and church servers during services and ceremonial occasions.
Vanpoulles offers traditional and organist surplices in different styles and adult sizes. Features such as the neckline, sleeve design and overall length can vary depending on the intended use.
How Are Cassocks and Surplices Worn?
The traditional arrangement is straightforward: wear the cassock first, then the surplice over it. This creates a layered appearance that combines the structured design of the cassock with the looser form of the surplice.
The exact use can depend on the denomination, service and role of the wearer. Church traditions can vary, so it is sensible to consider local practice when selecting liturgical clothing.
Who Wears a Cassock and Surplice?
A cassock and surplice may be worn by different people involved in church worship. Depending on the tradition, this can include clergy, choir members, altar servers and other church assistants.
The garments can therefore suit a range of formal church settings. Choosing the right style and size is especially important when several members of a choir or serving team need a consistent appearance.
Cassocks for Church Servers
Servers’ cassocks are designed with the practical requirements of church and altar service in mind. They may need to accommodate movement during processions, worship and other duties while retaining a neat appearance.
Vanpoulles includes servers’ cassocks within its vestments and textile products collection. Its range includes garments for both children and adults, so churches can choose suitable options for different members of a serving team.
Choosing the Right Surplice
When choosing a surplice, consider several factors. The garment should suit its intended role and allow enough room for comfortable movement.
Key considerations include:
- The correct size and length
- The style of neckline
- Sleeve design
- The intended church or choir use
- Ease of care and maintenance
- Compatibility with the cassock underneath
Vanpoulles’ traditional surplice features a round neck and is offered in adult sizes. Its organist surplice has split sleeves, providing another option for a specific role.
Caring for Church Robes and Vestments
Proper care can help church garments remain suitable for regular use. Always follow each garment’s cleaning instructions, especially when different fabrics or decorative details are involved.
Storage is also important. Vestments should be kept clean, dry and protected from unnecessary creasing or damage. A suitable clergy travel cover can also make transporting robes and albs more convenient when garments need to be taken between locations.
Finding Suitable Cassock and Surplice Garments
Choosing a cassock and surplice involves more than selecting a traditional style. Churches and individuals should consider the intended role, correct fit, comfort, appearance and the requirements of their particular worship setting.
A suitable range makes it easier to find garments for clergy, servers, and choir members, as well as other liturgical clothing. Vanpoulles provides a comprehensive selection of vestments and textile products, including cassocks, surplices, albs, stoles, copes, chasubles and other church garments.

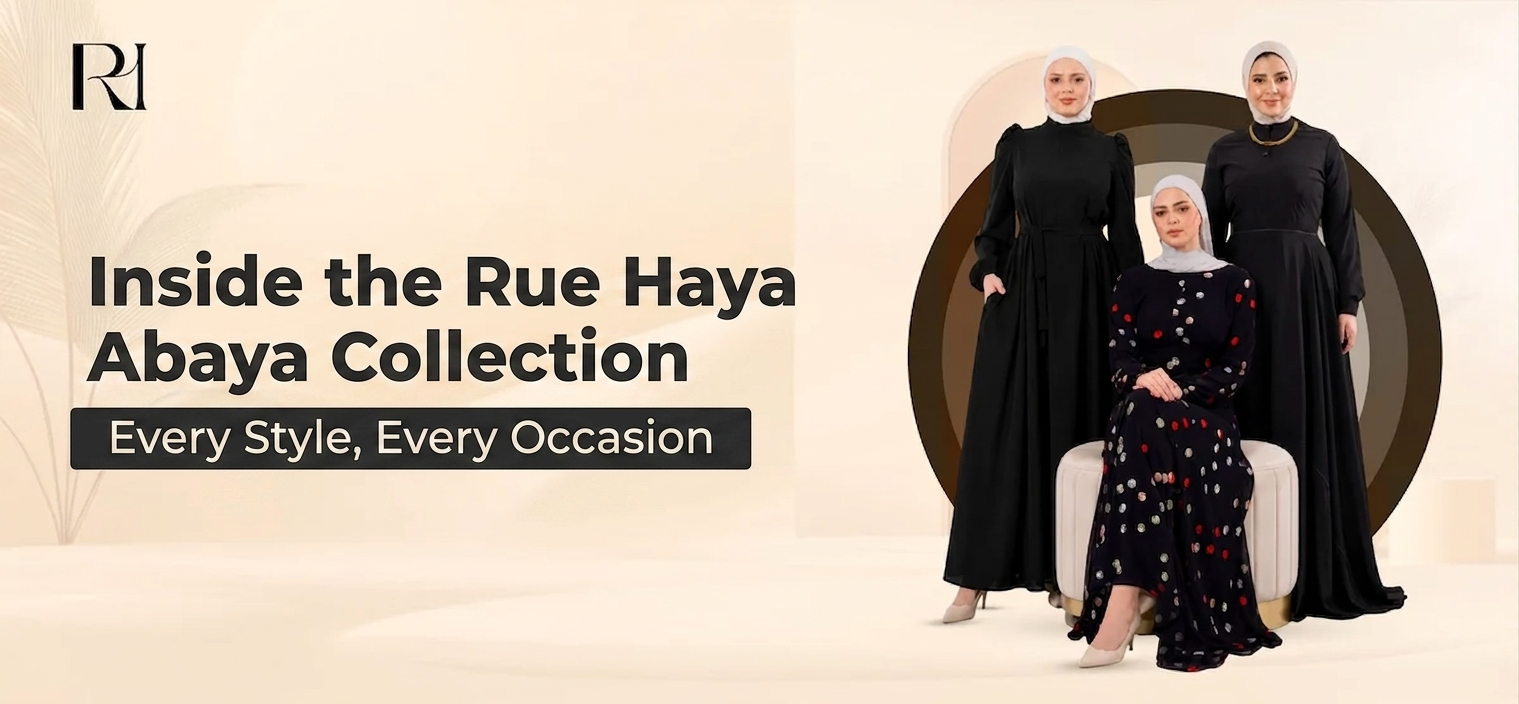
If you’ve been searching for an abaya that actually fits your life — not just your measurements — the Rue Haya abaya collection is worth a close look. Designed for women who want sophistication without compromise, every piece in the collection is built around a simple premise: modesty and elegance aren’t opposites. They’re the same thing, done right.
Here’s a complete look at the styles available, the details that set each one apart, and how to choose the right abaya for what you actually need.
Open Abayas: Effortless Layering, Maximum Versatility
The open abayas at Rue Haya are the collection’s most versatile category — and for many women, the most-reached-for. Worn like a long coat or duster over your outfit, abayas open at the front give you full coverage while keeping whatever you’re wearing underneath visible and part of the look.
The Suhaila Satin Open Abaya collection is where this style shines brightest. Available in Champagne Gold, Soft Pistachio, Rose Gold, and Soft Ivory, these flowy abaya styles drape beautifully in a silky satin that moves with every step. The Champagne Gold and Rose Gold options are particularly striking for special occasions, while the Soft Ivory and Pistachio work effortlessly for both everyday wear and daytime events.
For a more structured take on abayas open, the Naima Contrast Trim Structured Knit Abaya in Black pairs a relaxed open silhouette with a clean white contrast trim — graphic, modern, and completely wearable across seasons.
The Rimal Soft Crepe Open Abaya in Soft Peach Floral and Soft Blush Floral bring something softer to the open abaya category — printed crepe in delicate colorways that work beautifully for garden events, Eid gatherings, or spring outings.
Closed Abayas: Clean Lines, No-Fuss Elegance
For women who prefer a seamless silhouette, the closed abaya delivers exactly that. No front opening, no layering required — just a clean, unbroken line from shoulder to hem that looks polished with almost no effort.
The Layal Noir Soft Crepe Abaya is the standout in this category. A quietly refined closed abaya in soft crepe, available in Black, Off White, Navy, and Beige. The Black and off white abaya versions are particularly striking: the Black features a crisp white contrast trim that creates a sharp, editorial look, while the white abaya dress version reverses that contrast with black trim on an ivory base.
This is the style to reach for when you want your abaya to do the work — when you want to walk in looking completely put-together with minimal effort. Pair the black with heeled mules; the off white with gold jewelry and a soft chiffon hijab.
Two-Piece Abayas: Style That Works Harder
The two piece abaya is one of the most exciting developments in modest fashion — and the Rue Haya abaya collection has invested deeply in this category.
The Samira Embroidered Crepe Abaya Set is the flagship two-piece in the collection, currently on sale. Available in Black, Navy, Olive Green, and Spiced Red, each set features delicate embroidery detail that elevates a classic silhouette into something genuinely special. Worn together, they read as one seamless look; separately, each piece can be styled with other items in your wardrobe.
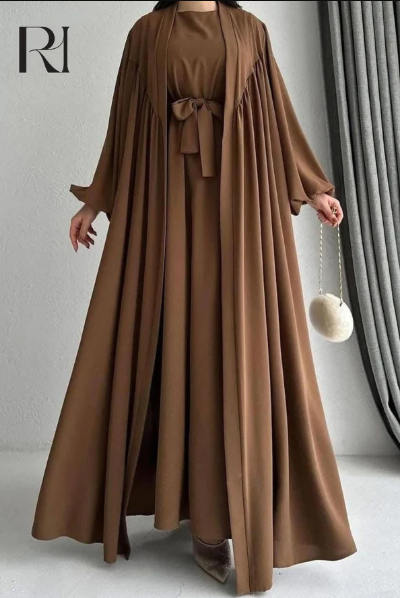
For a more relaxed two-piece aesthetic, the Hind Lightweight Silk Two-Piece Abaya Set is the go-to. Available in Mocha Brown, Black, Denim Blue & Nude, Emerald & Nude, and Burgundy & Nude — each set features a belted waist that adds structure without stiffness. The chocolate brown abaya version in Mocha Brown is a particularly strong seller, offering a rich warm tone that works across seasons and skin tones.
The Majda Sheer Organza Abaya Set takes two-piece styling into more formal territory — a sheer organza outer layer over a matching inner piece, available in Gold & Black, Lavender & Black, Navy & Black, and Beige & Black. These are the sets for weddings, formal occasions, and events where you want to arrive and be remembered.
Special Styles Worth Knowing

The Keffiyeh Abaya
One of the most meaningful pieces in the collection is the keffiyeh abaya — an abaya that incorporates keffiyeh-inspired embroidery or pattern detailing as a quiet but powerful nod to Palestinian heritage. For the Rue Haya brand, founded by a Palestinian-American-Canadian family, this piece carries particular significance. It’s a wearable expression of identity, and it’s designed to be worn with pride.
The Chocolate Brown Abaya
Rich, warm, and endlessly wearable — the chocolate brown abaya has become one of the most requested tones in modest fashion. The Hind Lightweight Silk Two-Piece Abaya Set in Mocha Brown and the Suhaila Draped Satin Open Abaya in Cocoa Brown both deliver this colorway beautifully. Neither is a flat brown — both carry a warmth and depth that photograph well and work across a wide range of hijab colors.
The Black Abaya Dress
The black abaya dress needs no introduction — it’s the wardrobe constant that every collection is measured against. In the Rue Haya abaya collection, the Samira Embroidered Crepe Abaya Set in Black, the Layal Noir Soft Crepe Abaya in Black, and the Aya Royalty Crepe Abaya Set in Black each offer something different: embroidered detail, clean minimalism, and structural elegance respectively.
Prayer Abayas
For women who use their abaya as a prayer abaya — wearing it both as an outer garment and for salah — look for styles in softer, more flexible fabrics with relaxed cuts that allow full freedom of movement through every position of prayer. The Suhaila Satin Open Abaya styles and the Layal Noir Closed Abaya in crepe are both well-suited for this purpose, with fabrics that move naturally and cuts generous enough for complete modesty during prayer. For dedicated prayer garments, the Rue Haya prayer wear collection offers purpose-built options.
How to Choose Your Rue Haya Abaya
The right Rue Haya abaya comes down to how you live and what you need it for.
For daily ease and layering flexibility → open abayas in satin or crepe. For clean, effortless elegance with no layering → closed abaya in soft crepe. For styling range and fashion versatility → two piece abaya sets in silk or embroidered crepe. For formal and special occasions → the Majda Organza or Sabeel Embroidered Chiffon sets. For warm tones that work year-round → the chocolate brown abaya in silk or satin. For a white abaya dress or off white abaya with contrast trim → the Layal Noir in Off White.
Browse the complete Rue Haya abaya collection — 66 pieces across open, closed, and two-piece styles, designed for women who refuse to choose between their values and their wardrobe.
Finding someone you trust to care for your children can be one of the more difficult decisions a parent makes. A babysitter may be responsible for meals, playtime, bedtime routines, and responding appropriately when unexpected situations arise.
For that reason, finding childcare should involve more than simply choosing the first available person.
Parents can make the process easier by establishing their requirements in advance, checking a babysitter’s experience, asking appropriate questions, and making sure both the caregiver and child are comfortable with the arrangement.
Decide What Type of Childcare You Need
Start by considering why you need a babysitter and how frequently you expect to use the service.
Some families only require occasional childcare for evenings or appointments. Others may need someone several times each week while parents are working.
The age of your child matters too. Looking after a school-age child can involve different responsibilities from caring for an infant.
Write down the expected hours, children’s ages, routines, and any important requirements before beginning your search.
Look for Relevant Childcare Experience
Experience should be relevant to your family’s circumstances.
If you have an infant, ask whether the babysitter has previously cared for babies. Families with several children may want someone comfortable supervising multiple age groups simultaneously.
Parents should also ask about previous responsibilities rather than simply asking how many years someone has worked as a babysitter.
Someone with the right type of experience may be a better fit than a person with more general childcare experience.
Use Appropriate Sources
Personal recommendations can be useful, particularly when they come from parents you know and trust. Professional babysitting services provide another option.
For families trying to find trusted babysitters in Dubai, using a service that works with licensed babysitting agencies and trained caregivers can provide a more structured way of arranging childcare. ServiceMarket states that the babysitters available through its partner agencies have childcare experience and professional training, including first aid and Basic Life Support.
Whatever method you use, avoid treating availability as the only selection criterion.
Interview Potential Babysitters
Speaking with a prospective babysitter gives you an opportunity to determine whether they understand your expectations.
Ask about their childcare experience, the ages they have previously cared for, and how they approach common situations.
You might discuss how they would handle a child who refuses to go to bed, becomes upset when a parent leaves, or does not want to eat.
The objective is not to catch someone out with difficult questions. It is to understand how they think and whether their approach is compatible with yours.
Ask About Emergency Preparedness
Emergencies are unlikely, but caregivers should know how to respond appropriately if something unexpected happens.
Ask about relevant first-aid training and what the babysitter would do in an emergency.
Leave clear emergency contact information whenever somebody else is caring for your children.
Parents should also explain anything specific to their child that the caregiver needs to know.
Explain Your Child’s Routine
Children often feel more comfortable when familiar routines continue while their parents are away.
Explain normal meal times, activities, bedtime routines, and household rules.
If your child is allowed a certain amount of screen time, make that clear. The same applies to snacks, homework, outdoor play, and bedtime.
Written instructions can be useful, particularly during the babysitter’s first few visits.
Discuss Allergies and Other Important Information
Never assume a babysitter knows about a child’s individual requirements.
Parents should clearly communicate allergies, dietary restrictions, relevant medical information, and other essential instructions.
Show the babysitter where important supplies are located and make sure emergency contact details are easy to find.
If a child has requirements that need specialist attention, make sure the caregiver has the appropriate qualifications and experience.
Introduce the Babysitter to Your Child
Whenever practical, allow your child to meet a new babysitter before leaving them together for an extended period.
Observe how they interact.
A good babysitter should be able to communicate appropriately with the child rather than focusing exclusively on the parents.
Some children need time to become comfortable with someone new, so an initially quiet reaction does not necessarily indicate a poor match.
Establish Clear Household Rules
Different households have different expectations.
Explain which rooms can be used, whether visitors are permitted, what food is available, and any rules regarding phones or other devices while the babysitter is responsible for the children.
Clarity prevents misunderstandings.
You should also discuss whether the caregiver is expected to perform tasks beyond direct childcare. Do not assume additional household duties are included unless they have been agreed upon.
Make Communication Easy
Both parents and babysitters should know how to contact each other.
Tell the caregiver where you will be and approximately when you expect to return.
Parents may also want occasional updates, particularly when using a new babysitter. Agree on what is reasonable beforehand rather than repeatedly contacting the caregiver throughout the evening.
Good communication should provide reassurance without making it difficult for the babysitter to focus on the children.
Review the Experience Afterwards
When you return home, ask how everything went.
Speak to the babysitter about meals, activities, bedtime, and anything unusual that happened.
You can also ask your children about their experience in an age-appropriate way.
If everyone was comfortable and the babysitter followed your instructions, you may have found someone worth booking again.
Consistency can be valuable because children often become more comfortable with caregivers they already know.
Final Thoughts
Finding a babysitter requires a balance between practical requirements and personal trust.
Experience, training, communication, availability, and compatibility with your children should all be considered before making a decision.
Taking time to evaluate potential caregivers can make childcare arrangements more comfortable for parents, children, and babysitters alike.
Frequently Asked Questions
What should I look for when choosing a babysitter?
Look for relevant childcare experience, appropriate training, good communication, reliability, and an approach that suits your family’s expectations.
Should I interview a babysitter first?
An interview can help you understand the caregiver’s experience and approach to childcare before leaving your children in their care.
What information should I give a babysitter?
Provide emergency contacts, children’s routines, allergies or relevant health information, household rules, meal instructions, and other information necessary to care for your children safely.
Can I hire a babysitter for only a few hours?
Yes. Part-time babysitting services can be appropriate when parents need childcare for particular periods rather than a full-time nanny. ServiceMarket, for example, offers bookings between four and 12 hours.
Is it better to use the same babysitter regularly?
Using the same caregiver can provide consistency and allow the babysitter to become familiar with your child’s personality and routines, subject to availability.



-

 Celebrity1 year ago
Carolin Bacic: Life, Biography, Family, and Legacy
-

 Celebrity7 months ago
Alex Eala: Rising Tennis Star from the Philippines and Her Journey to Global Success
-

 Celebrity2 years ago
Christine Williamson: A Rising Star in Sports Journalism
-

 Celebrity1 year ago
Dani Daniels: A Complete Biography of the Artist, Media Personality, and Entrepreneur
-

 Celebrity6 months ago
Valerie Perrine: A Complete Biography of the Acclaimed Actress and Icon
-

 Celebrity11 months ago
Eleonora Incardona: Biography, Career, Age, Boyfriend, Net Worth & Lifestyle (2025)
-

 Celebrity2 years ago
Vera Davich: Biography, Life, and Legacy2025
-

 Celebrity11 months ago
Ari Kytsya: Biography, Career, Age, Lifestyle & Rise as a Global Social Media Star