
Home Improvement
5 Movie Room Ideas for Home That Will Wow Your Guests

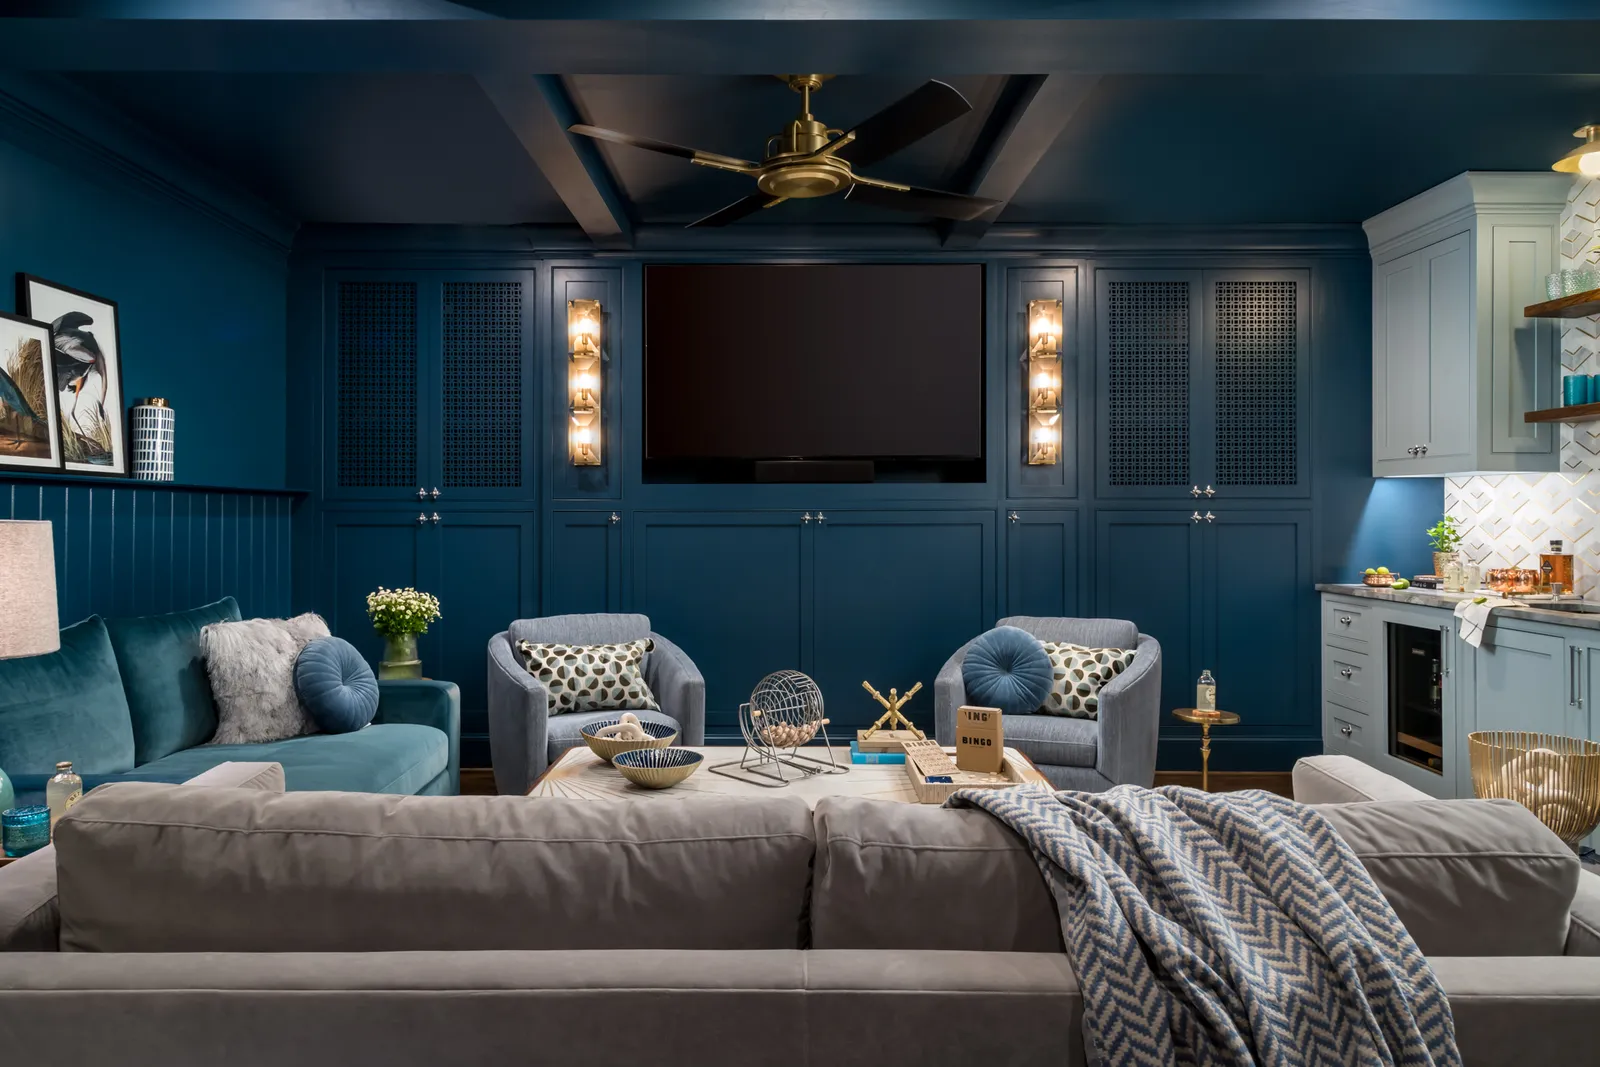
According to the U.S. Bureau of Labor Statistics’ American Time Use Survey, 2024, watching television remains the single most common leisure activity in American households, with adults averaging two hours and 36 minutes of viewing per day. That’s a meaningful amount of time to spend in a space that hasn’t been set up to make the most of it.
A room designed specifically for watching, with the right screen, sound, seating, and atmosphere, turns that daily habit into something worth looking forward to, and something guests tend to remember long after the evening ends.
Strong home movie room ideas don’t require a blank-check renovation budget or a room the size of a commercial screening hall. What they require is a clear concept, a smart layout, and a few well-made decisions. These five ideas cover a range of spaces, styles, and investment levels, and each one is genuinely achievable.
What Makes a Movie Room Feel Like a Destination, Not Just a Room with a TV
The difference between a room that impresses guests and one that doesn’t comes down to whether the space was designed with a purpose or just furnished with equipment. A movie room that wows tends to get three things right: the display and sound work together, the seating is comfortable enough for a full film, and the atmosphere, through lighting, materials, and layout, reinforces the sense that this room is built for watching.
Theater seating for home use has improved significantly in recent years. Choosing seating built specifically for long viewing sessions rather than repurposing a living room sofa is one of the highest-impact upgrades available at any budget level. With that foundation in place, these five home movie room ideas show what great execution looks like across different room types and design directions.
Five Home Movie Room Ideas for Every Space, Style, and Budget
Each of the following ideas works as a complete concept you can take from a blank room to a finished space. Some suit a spare bedroom, others a full basement or dedicated room. The one that fits best depends on the space available and how the room will be used day to day.
Idea 1: The Compact Dark Room
A small, enclosed room such as a spare bedroom or a converted home office is often the best starting point for a movie room. Its compact size works in its favor: less volume to fill with sound, easier light control, and a more intimate atmosphere that larger rooms struggle to replicate.
The display choice in a compact room leans toward a large flat-screen TV in the 65 to 75-inch range. Throw distance is limited, and wall reflections in a tight space can reduce projector image quality. A good OLED panel produces exceptional contrast in a dark room and requires no calibration or alignment.
Key features of an effective compact setup:
- Full blackout on all windows using roller blinds or lined curtains; any light bleed in a small room is immediately obvious during dark scenes
- A single recliner row or compact loveseat positioned at roughly 1.5 times the screen’s diagonal measurement from the display
- Bias lighting behind the screen on a dimmable circuit, which reduces eye strain and makes the image appear richer without adding ambient glow to the room
Idea 2: The Basement Cinema Conversion
A basement offers everything a good movie room needs by default: separation from the rest of the house, concrete construction that contains sound, and natural darkness that makes projection viable without major light management work.
A 4K laser projector paired with a 100 to 110-inch fixed-frame screen delivers a genuinely cinematic result, and a basement is one of the best environments to get the most out of it. The projector should be ceiling-mounted centrally to the screen, and the screen center should sit at roughly seated eye level for the front row.
The step-by-step approach to a well-functioning basement movie room:
- Address the acoustics first. Lay carpet or a thick area rug across the full floor and add fabric panels or heavy curtains on at least two walls before any equipment goes in.
- Run all cabling before furniture goes in. HDMI, speaker, and power cables should be routed through walls or under flooring while the room is still empty.
- Mount the screen or display before finalizing the seating position. The viewing angle to the screen center determines ideal row placement, which needs to be confirmed with the display in its final position.
- Install bias lighting and scene control. A smart lighting system with two or three presets transforms how the room operates day to day.
- Add seating last, once all measurements are confirmed. Recliners need specific floor clearance at full extension, so placement should only be finalized after everything else is in position.
Idea 3: The Dedicated High-End Theater Room
A fully dedicated theater room is the most considered of all home movie room ideas, and the one guests tend to remember longest. Every decision, from the ceiling treatment to the seat fabric, is made in service of a single purpose.
The visual reference for premium dedicated rooms has shifted toward boutique cinema interiors: dark, moody palettes, deep-pile carpet across the full floor, timber millwork around the screen surround, and deliberate accent lighting that sets the space apart from anywhere else in the home.
Features that define a standout dedicated theater room:
- In-wall or in-ceiling speakers flush-mounted so no visible hardware appears in the room during viewing
- Two tiered rows of purpose-built recliners, with the rear row elevated 12 to 16 inches on a timber riser platform for clean sightlines
- Acoustic panel treatment at primary reflection points, chosen in a fabric and color that works within the room’s overall palette
Idea 4: The Multipurpose Media Lounge
Not every home has space for a fully dedicated theater, and a multipurpose media room that serves as a lounge, games room, and screening space throughout the week is a genuinely strong alternative. The design challenge is building a room that functions well in each mode without seriously compromising any of them.
Flexible furniture is the key. A combination of theater-grade recliners in the primary viewing position and a secondary lounge area with a sofa or ottomans gives the room enough range to shift between a casual gathering space and a proper screening setup. Lighting on multiple independent circuits handles the transition between modes cleanly, and a motorized or retractable screen keeps the room from feeling like a theater when it’s being used for something else.
Idea 5: The Relaxed Social Cinema
For homes with a larger open space, or where a more relaxed and informal atmosphere suits the household better, a social cinema concept works well and tends to feel genuinely distinctive to guests.
Large-format projection onto a painted feature wall, low-profile seating such as oversized floor cushions, modular poufs, or a curved sectional sofa arranged in a loose arc, warm pendant lighting, and a sound system integrated without visible speakers: the atmosphere is social and inviting rather than formal. This is a particularly good match for households that host mixed groups where some guests prefer a more casual setting over a structured theater row.
How to Compare the Five Ideas Before Committing to One
Choosing between these movie room ideas for home comes down to three things: room size, primary use, and budget. The table below maps each idea to those variables at a glance.
| Idea | Ideal Room Size | Primary Use | Approx. Budget Range |
| Compact Dark Room | Under 150 sq ft | Daily personal viewing | $3,000–$8,000 |
| Basement Cinema Conversion | 150–300 sq ft | Dedicated family or group viewing | $8,000–$20,000 |
| Dedicated High-End Theater | 200 sq ft or more | Serious cinephile or entertaining | $25,000–$60,000+ |
| Multipurpose Media Lounge | 180–350 sq ft | Mixed daily use and screening | $6,000–$18,000 |
| Relaxed Social Cinema | 250 sq ft or more | Social gatherings and group viewing | $5,000–$15,000 |
Where to Start When Turning a Room into a Home Cinema Worth Showing Off
The most useful first step in any of these movie room ideas for home is settling on the primary use case before choosing any equipment. A room that hosts ten guests monthly has different requirements than one used daily by two or three people. Getting that clarity early keeps the budget focused and avoids the most common home theater mistake: spending heavily on the display while underinvesting in sound, seating, and the acoustic character of the room.
A home movie room that impresses guests is one where every element was chosen for the experience it produces. That’s the standard worth building toward.
FAQ
Does a home movie room need acoustic treatment to sound good?
Not necessarily, but the room will perform noticeably better with at least basic treatment in place. A thick rug across the floor, heavy curtains on the walls, and upholstered seating collectively absorb the mid-range reflections that make dialogue unclear and action sequences sound muddy. Full acoustic panel treatment at primary reflection points is worth adding once the room is in regular use and the difference becomes easier to hear.
Can a multipurpose room work as both a home office and a movie room?
Yes, with the right layout and display choice. A large flat-screen TV on a swivel mount or a motorized screen that retracts when not in use allows the room to shift between uses without one function dominating the other. Lighting on separate circuits with scene presets makes the transition between work mode and viewing mode straightforward.
What ceiling height is needed for a two-row tiered home theater?
A two-row tiered setup with a 12 to 16-inch riser for the rear row typically requires a minimum ceiling height of 9 feet to maintain comfortable headroom in both rows. An 8-foot ceiling can work with a lower riser of 8 to 10 inches, but the reduced elevation means sightlines are tighter and front-row headrests become more of a visibility concern.
Is a projector or a TV better for a home movie room used during the day?
A flat-screen TV is the more practical choice for rooms that get regular natural light. Even good blackout curtains don’t eliminate all ambient light in a daytime setting, and projectors lose contrast in even low-level light. A modern QLED or OLED TV in the 75 to 85-inch range performs well across all lighting conditions and requires no setup adjustment. A projector becomes the stronger option in rooms that can be fully darkened.
Can a movie room add resale value to a home?
A well-executed media room can increase perceived value and make a listing stand out. Dedicated theaters appeal to a narrower buyer pool; multipurpose media rooms tend to resonate more broadly. Listing the space as a “media room” or “bonus room” typically keeps buyer interest wider.



That final coat of paint on the walls often feels like the finishing line, but the real personality of a home shines through in the little things that come next. These small, often overlooked elements are what truly lift a space from just being decorated to feeling genuinely thought out. Paying close attention to your hardware, finishes, and fittings is the secret sauce for creating a home that feels both personal and polished.
These subtle choices actually make a huge difference to how a room feels overall. Just think about the satisfying weight of a solid brass doorknob, or the clean, modern vibe of a minimalist light switch. These aren’t just things you see; they’re things you touch, and they quietly tell you about quality and intention.
Why Finishes Truly Matter
The finish of your hardware is one of the most powerful ways to tie everything together visually. Whether you’re into cool chrome, sleek matte black, or warm brass, keeping it consistent is key. When your doorknobs, cabinet handles, window latches, and light fittings all share the same finish, it creates a subtle but strong visual thread running through your home. This repetition helps your eyes glide smoothly through the space, making it feel organised and calm.
Take antique brass, for example. It brings a timeless warmth and a sense of lived-in luxury that works beautifully in both traditional and modern homes. Its golden tones can soften a minimalist space or deepen the richness of a more classic design.
This consistent approach can go beyond just handles and hinges; thinking about matching brass lighting for your home adds another layer of sophistication. When every metallic piece speaks the same design language, your home ends up feeling intentional and expertly put together.
Matching Hardware to Your Personal Style
The hardware you choose really shows off your personal taste. Before you settle on a particular style, it’s a good idea to find your home design style to make sure your choices feel like you. If you love a minimalist look, you might lean towards sleek, simple bar handles in matte black or stainless steel. If your style is more industrial, perhaps you’d prefer knurled handles and sturdy, functional designs.
For those who adore a bit of vintage or cottage charm, aged brass or classic ceramic knobs can add that perfect touch of nostalgia. The trick is to see hardware not just as something practical, but as an accessory for your home. Just like a belt or a piece of jewellery can complete an outfit, the right hardware can perfectly express your living space’s personality.
Beyond the Basics: Electrical Fittings
One of the most commonly overlooked spots for a design upgrade is electrical fittings. For ages, the standard white plastic switch and socket have been the go-to, but let’s be honest, they don’t do much for a room’s look. Swapping these out for fittings with a more deliberate design and finish can make a surprisingly big difference.
Imagine a beautifully wallpapered wall, not broken up by a plain plastic rectangle, but by a sleek, screwless socket in a bronze or nickel finish. These small changes stop functional bits from clashing with your design. Instead, they become part of it. Investing in high-quality switches with a satisfying click, or dimmer switches that match your other hardware, adds another layer of subtle luxury you’ll appreciate every single day.
Crafting a Cohesive Interior Narrative
Ultimately, all these little decisions work together to tell a story about your home and the people who live in it. When your doorknobs, light switches, cabinet pulls, and tapware all share a common design DNA, you create a cohesive story for your interior. This doesn’t mean every single item has to be identical, but they should definitely feel like they belong together.
This attention to detail signals a home that’s been put together with care and thought. It goes beyond fleeting trends to create a lasting sense of style. By starting with the small things, you build a strong foundation for a home that’s not just beautiful, but also a true reflection of your personal taste.
These thoughtful details are what truly turn a house into a home with its own distinct point of view.
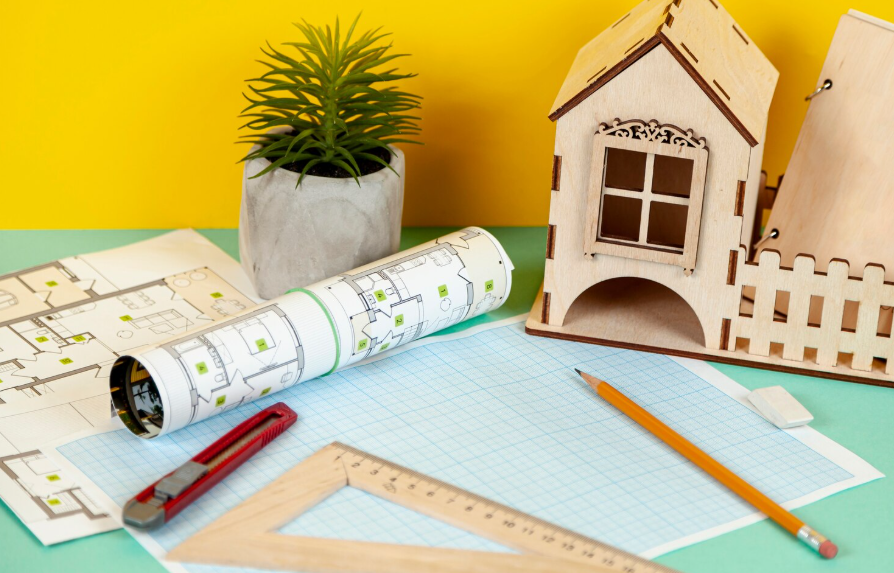
Building a custom home offers something that buying an existing property cannot always provide: the opportunity to create a home around the way you actually want to live.
Room layouts, storage, natural light, materials, energy performance, accessibility, and architectural character can all be considered from the beginning.
That flexibility also creates complexity.
A custom build involves land, design, permissions, budgets, contractors, materials, schedules, and hundreds of individual decisions.
Careful preparation can make the process more manageable and help homeowners turn an initial idea into a practical finished property.
Start With Your Priorities
Before thinking about finishes and furniture, identify what the home needs to achieve.
Consider the number of bedrooms, bathrooms, living spaces, working areas, storage requirements, parking, outdoor areas, and accessibility needs.
Think about lifestyle rather than simply room count.
A family that regularly entertains may value large connected living spaces, while someone working permanently from home might prioritize a quiet office.
Separate essential requirements from features that would simply be nice to have.
This becomes useful when design or budget decisions require compromises.
Evaluate the Site
The site can influence almost every part of a custom build.
Orientation, access, ground conditions, drainage, neighbouring properties, utilities, levels, and surrounding development can affect design and construction.
A design should respond to the site rather than treating it as an empty rectangle.
For example, orientation can influence opportunities for natural light, while changes in ground level can affect foundations and landscaping.
Appropriate professional assessments can identify limitations before significant design decisions are finalized.
Establish a Realistic Budget
Custom-build budgets need to account for more than construction materials and labour.
Professional fees, surveys, permissions, utility connections, site preparation, landscaping, kitchens, bathrooms, finishes, and other expenses may all contribute to the total.
A contingency can also provide flexibility for legitimate unexpected costs.
Be transparent about the budget with the professionals involved.
Designing a property that cannot realistically be constructed within the available budget wastes time and can lead to difficult compromises later.
Work Closely With the Design Team
Architectural design is where requirements begin becoming a physical building.
A good design process considers aesthetics and practicality together.
Discuss how rooms connect, where natural light enters, how people move through the property, where storage will be located, and how the home might adapt to future requirements.
Construction considerations should also be discussed during design.
Early communication between architects, engineers, and construction professionals can help identify potential buildability issues before they reach the site.
Choose a Builder With Relevant Experience
Building a complete home requires different capabilities from completing a small refurbishment.
Look for contractors with relevant residential construction experience and examine the type and scale of their previous projects.
Reviewing previous work and the contractor’s approach to project delivery can help homeowners determine whether their experience matches the proposed build. Those researching custom build homes by ARN Projects can review how the company approaches bespoke residential construction, including collaboration, project planning, construction, and completion.
Communication should also influence the decision.
A custom build can take a considerable amount of time, so homeowners need a working relationship that supports clear communication throughout the project.
Define the Scope Before Construction
Detailed documentation helps reduce uncertainty.
Plans and specifications should make clear what the contractor is expected to provide.
Materials, fixtures, finishes, electrical requirements, heating, plumbing, doors, windows, and other components should be defined as thoroughly as reasonably possible before construction.
Unresolved decisions can create delays if contractors reach a stage where they cannot proceed without additional information.
Making key choices early can therefore support smoother project delivery.
Think About Energy Performance
A custom build provides an opportunity to consider energy performance from the beginning.
Orientation, insulation, glazing, airtightness, ventilation, heating, and renewable technologies can all influence long-term energy use.
These elements work best when considered as part of an integrated design.
Adding individual technologies without considering the wider building may not produce the expected results.
Homeowners should discuss both upfront costs and expected long-term performance when comparing options.
Plan Storage Early
Storage is easy to underestimate when looking at attractive architectural drawings.
Consider everyday belongings.
Where will coats, shoes, cleaning equipment, luggage, children’s items, sports equipment, food, and household supplies be stored?
Built-in storage can often be integrated more effectively during the design stage than added after construction.
Practical storage can also help maintain the clean appearance homeowners often want from a newly built property.
Consider Future Accessibility
A custom home can be designed around current requirements while also considering how those requirements might change.
Wider circulation spaces, suitable entrances, flexible rooms, and thoughtful bathroom layouts can improve long-term usability.
Accessibility does not necessarily mean creating a clinical-looking home.
When considered early, many practical features can be integrated naturally into the architecture.
Future flexibility can be especially valuable for homeowners planning to remain in the property for many years.
Control Changes During Construction
Even carefully planned projects experience changes.
A homeowner may select a different material or request an alteration after seeing part of the building physically constructed.
Changes should be managed carefully.
Before approving one, establish how it affects cost, schedule, materials, and other areas of work.
Numerous small changes can collectively have a substantial impact on the final budget.
Documenting significant variations provides a clear record for everyone involved.
Maintain Regular Communication
Custom construction involves ongoing decisions.
Agree on how progress will be communicated and who is responsible for answering questions.
Regular updates can help homeowners understand what has been completed and what decisions are approaching.
Concerns should be raised promptly.
Waiting until final handover to discuss something noticed months earlier can make correction considerably more difficult.
Clear communication helps keep expectations aligned throughout the build.
Prepare for Handover
The final stage should include a structured review of the completed property.
Outstanding items should be identified and addressed according to the agreed process.
Homeowners may also receive documentation relating to warranties, equipment, certificates, systems, and maintenance.
Keep these records organized.
They can become important when maintaining the home or making alterations in the future.
A thorough handover marks the transition from construction project to finished home.
Frequently Asked Questions
What is a custom-build home?
A custom-build home is designed and constructed around the requirements of a particular homeowner rather than purchased as an already completed standard property.
How should I choose a custom home builder?
Look at relevant project experience, previous work, project management, communication, quality, scope clarity, and the contractor’s ability to deliver the type of home proposed.
Should I establish my budget before design begins?
Yes. Providing realistic budget information helps the design and construction teams develop proposals that are more likely to be financially achievable.
Why are site surveys important?
Surveys and investigations can identify conditions relating to boundaries, ground, drainage, levels, utilities, and other factors that may affect design and construction.
Can a custom home be more energy efficient?
It can. A new design provides opportunities to consider orientation, insulation, glazing, heating, ventilation, airtightness, and other performance factors from the beginning.
When should I choose finishes?
Many important finishes should be selected before the relevant construction stages begin. Late decisions can delay work or limit available choices.
Should I plan for future accessibility?
Considering future requirements can improve long-term usability, particularly if you intend to remain in the property for many years.
What happens during final handover?
The finished property is reviewed, outstanding items are identified, and relevant documentation such as warranties, certificates, and operating information may be provided.

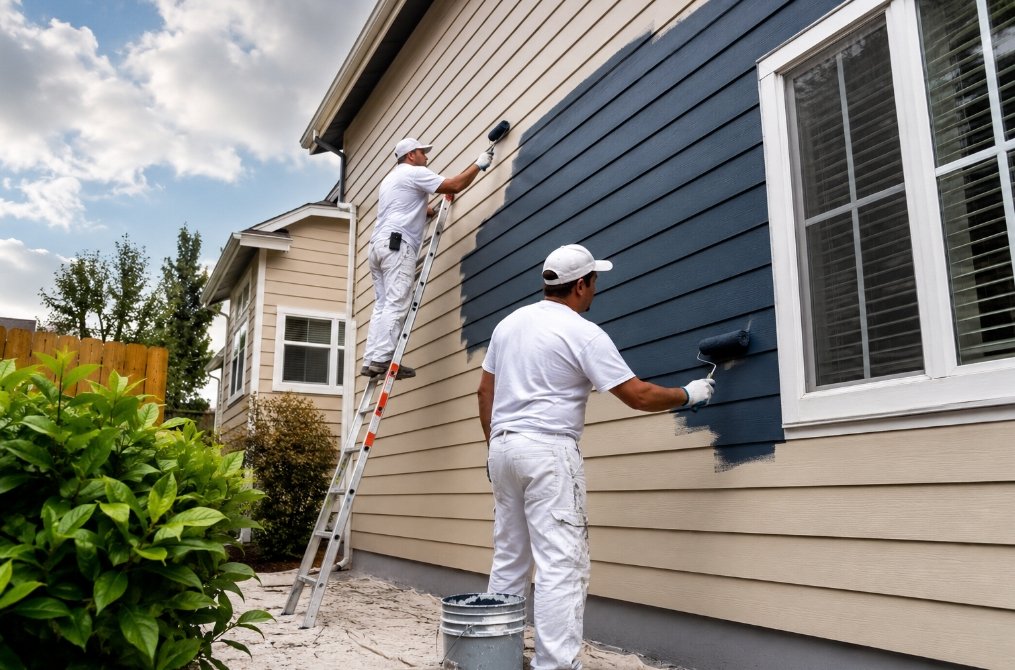
Painting your home can change how every room feels and how the entire property looks from the street. However, interior and exterior painting require different preparation, materials, techniques, and working conditions. Choosing the right approach can help you achieve a cleaner finish and better long term results.
I PAINT STUFF provides professional painting services for homeowners who want careful preparation and consistent workmanship. Whether you are refreshing a bedroom, updating a kitchen, or protecting the outside of your home, understanding the difference between the two types of painting can help you plan your project.
Understanding Interior and Exterior Painting
Interior painting focuses on surfaces inside your home, including walls, ceilings, doors, trim, and other finished areas. The goal is usually to improve appearance while creating a durable surface that can handle everyday use.
Exterior painting has a different purpose. Outdoor surfaces face sunlight, rain, snow, wind, temperature changes, and moisture. Exterior coatings need to withstand these conditions while helping protect materials such as siding, wood, stucco, and trim.
Because the conditions are different, painters cannot simply use the same products and methods indoors and outdoors.
What Interior Painting Involves
A successful interior painting project starts before the first coat goes on the wall. Furniture and flooring should be protected, and surfaces need to be inspected for holes, cracks, stains, peeling paint, or other imperfections.
Depending on the condition of the surface, preparation may include:
- Filling nail holes and small cracks
- Sanding rough areas
- Cleaning walls
- Repairing damaged drywall
- Caulking gaps around trim
- Priming areas that need additional coverage
The type of paint also matters. A bedroom may work well with a low sheen finish, while kitchens, bathrooms, hallways, and other high use areas may benefit from a more washable option.
Professional interior painting services can help you choose products based on the room’s purpose, surface condition, and desired appearance.
What Exterior Painting Requires
Exterior painting demands careful attention to weather and surface conditions. Before painting begins, the exterior should be checked for peeling paint, cracks, damaged wood, mildew, dirt, and areas where moisture may have caused problems.
Preparation may involve pressure washing, scraping loose paint, sanding, caulking, priming, and completing minor repairs.
Timing also matters. Paint needs suitable weather conditions to cure properly. Excessive moisture, extreme temperatures, or rain can interfere with the application and drying process.
A professional exterior painting project can improve curb appeal while adding a protective layer to exposed surfaces.
How I PAINT STUFF Prepares for Each Project
I PAINT STUFF approaches interior and exterior projects according to the needs of the specific surface. The preparation process can make a major difference in the final result.
For interior projects, the focus may include protecting your belongings, preparing walls, repairing imperfections, and creating clean lines around trim, doors, ceilings, and fixtures.
For exterior work, preparation may involve cleaning surfaces, removing failing paint, addressing minor surface problems, and selecting products designed for outdoor exposure.
This difference is important because a good painting job depends on more than applying paint evenly. The surface underneath needs to be ready for the coating.
Choosing the Right Paint and Finish
Paint selection should match the surface and the environment.
For interior walls, homeowners can choose from finishes such as flat, matte, eggshell, satin, and semi gloss. Each finish has different characteristics in terms of appearance, durability, and cleaning.
Exterior paints are formulated to handle outdoor conditions. The right product depends on the material being painted, its existing condition, exposure to the elements, and the desired appearance.
I PAINT STUFF can help homeowners consider these factors before selecting products for their projects. Choosing the right coating can reduce problems and help the finished surface maintain its appearance.
Common Challenges With Interior and Exterior Painting
Interior painting can become difficult when walls have extensive damage, stains, uneven textures, or old layers of paint. Furniture, fixtures, and tight spaces can also make certain areas harder to reach.
Exterior projects have their own challenges. Peeling paint, weathered wood, cracks, mildew, and difficult architectural features can require additional preparation.
Weather can also affect exterior work. A project may need to be adjusted when conditions are unsuitable for proper paint application.
Addressing these issues before painting begins can help prevent visible defects and premature paint failure.
Why Professional Painting Makes a Difference
Painting may appear straightforward, but achieving a professional finish requires preparation, technique, and attention to detail.
Professional painters understand how to prepare different surfaces, select appropriate products, protect surrounding areas, and apply coatings consistently.
Professional help can also save homeowners time. Instead of spending several weekends preparing and painting, you can have a structured process handled by an experienced team.
For larger projects, professional painting can also help maintain consistency across multiple rooms or exterior surfaces.
What to Expect From I PAINT STUFF
When you hire I PAINT STUFF, the project should begin with understanding what your home needs. Different surfaces may require different preparation and paint products.
For interior work, the process can include surface preparation, protection of surrounding areas, painting, detail work, and cleanup.
For exterior projects, preparation is especially important because outdoor surfaces experience constant exposure to changing conditions.
I PAINT STUFF offers painting solutions for homeowners who want to refresh, maintain, or update different areas of their properties. The company also provides services such as cabinet painting, fence staining, deck staining, and drywall repair.
How to Prepare Your Home Before the Painters Arrive
A little preparation from the homeowner can help the project move smoothly.
Before interior painting begins, you can remove small items from the room, clear access to walls, and discuss any areas that need special attention.
For exterior painting, move outdoor furniture, decorations, planters, and other items away from the work area when possible.
It is also helpful to communicate your preferred colors and finishes before the project starts. If you are unsure about a color, testing samples under different lighting conditions can help you make a better decision.
Clear communication with your painting contractor can prevent misunderstandings and keep the project organized.
Final Thoughts
Interior and exterior painting may share the same basic purpose, but the work involved is quite different. Interior projects focus heavily on appearance, clean application, room function, and surface preparation. Exterior projects must also account for weather, moisture, sunlight, and the condition of outdoor materials.
The right preparation and products can make a significant difference in the finished result.
If you are planning a painting project in Colorado, I PAINT STUFF can help you determine what your home needs and develop an appropriate approach for the job. Whether you want to refresh your interior walls, improve your home’s exterior appearance, or update cabinets and outdoor surfaces, choosing a professional painting team can make the process easier and more efficient.
FAQs
What is the difference between interior and exterior painting?
Interior painting focuses on walls, ceilings, trim, and other indoor surfaces. Exterior painting protects outdoor surfaces from weather and moisture.
How often should a home be painted?
Interior paint can last around 5 to 10 years. Exterior paint often lasts 5 to 10 years, depending on the surface and weather exposure.
Does exterior painting require special preparation?
Yes. Exterior surfaces may need cleaning, scraping, sanding, repairs, caulking, and priming before painting.
Can I PAINT STUFF paint both interior and exterior surfaces?
Yes. I PAINT STUFF provides professional interior and exterior painting services for Colorado homeowners.
Why hire professional painters?
Professional painters handle preparation, application, detail work, and cleanup, helping you achieve a consistent and durable finish.



-

 Celebrity1 year ago
Carolin Bacic: Life, Biography, Family, and Legacy
-

 Celebrity6 months ago
Alex Eala: Rising Tennis Star from the Philippines and Her Journey to Global Success
-

 Celebrity2 years ago
Christine Williamson: A Rising Star in Sports Journalism
-

 Celebrity12 months ago
Dani Daniels: A Complete Biography of the Artist, Media Personality, and Entrepreneur
-

 Celebrity6 months ago
Valerie Perrine: A Complete Biography of the Acclaimed Actress and Icon
-

 Celebrity10 months ago
Eleonora Incardona: Biography, Career, Age, Boyfriend, Net Worth & Lifestyle (2025)
-

 Celebrity2 years ago
Vera Davich: Biography, Life, and Legacy2025
-

 Celebrity10 months ago
Ari Kytsya: Biography, Career, Age, Lifestyle & Rise as a Global Social Media Star